


Chapter 1, Light: Its Anatomy of Six Elements
First Chapter, Revising my book, The Art Studio Companion

[Note: Last night I decided to revise my art tutorial book, The Art Studio Companion. Many of the lessons were from 20 years ago, and I have learned more about communicating since then. It is going to be a big project, there are 30 chapters. The project is for serious and dedicated artists, and I hope to write with clarity and insights to inspire novices and keep pros on their toes.]

In this study, we analyze six elements that create the feeling of light in art. Light opens the portal to our eyesight and it is the zenith of art techniques.
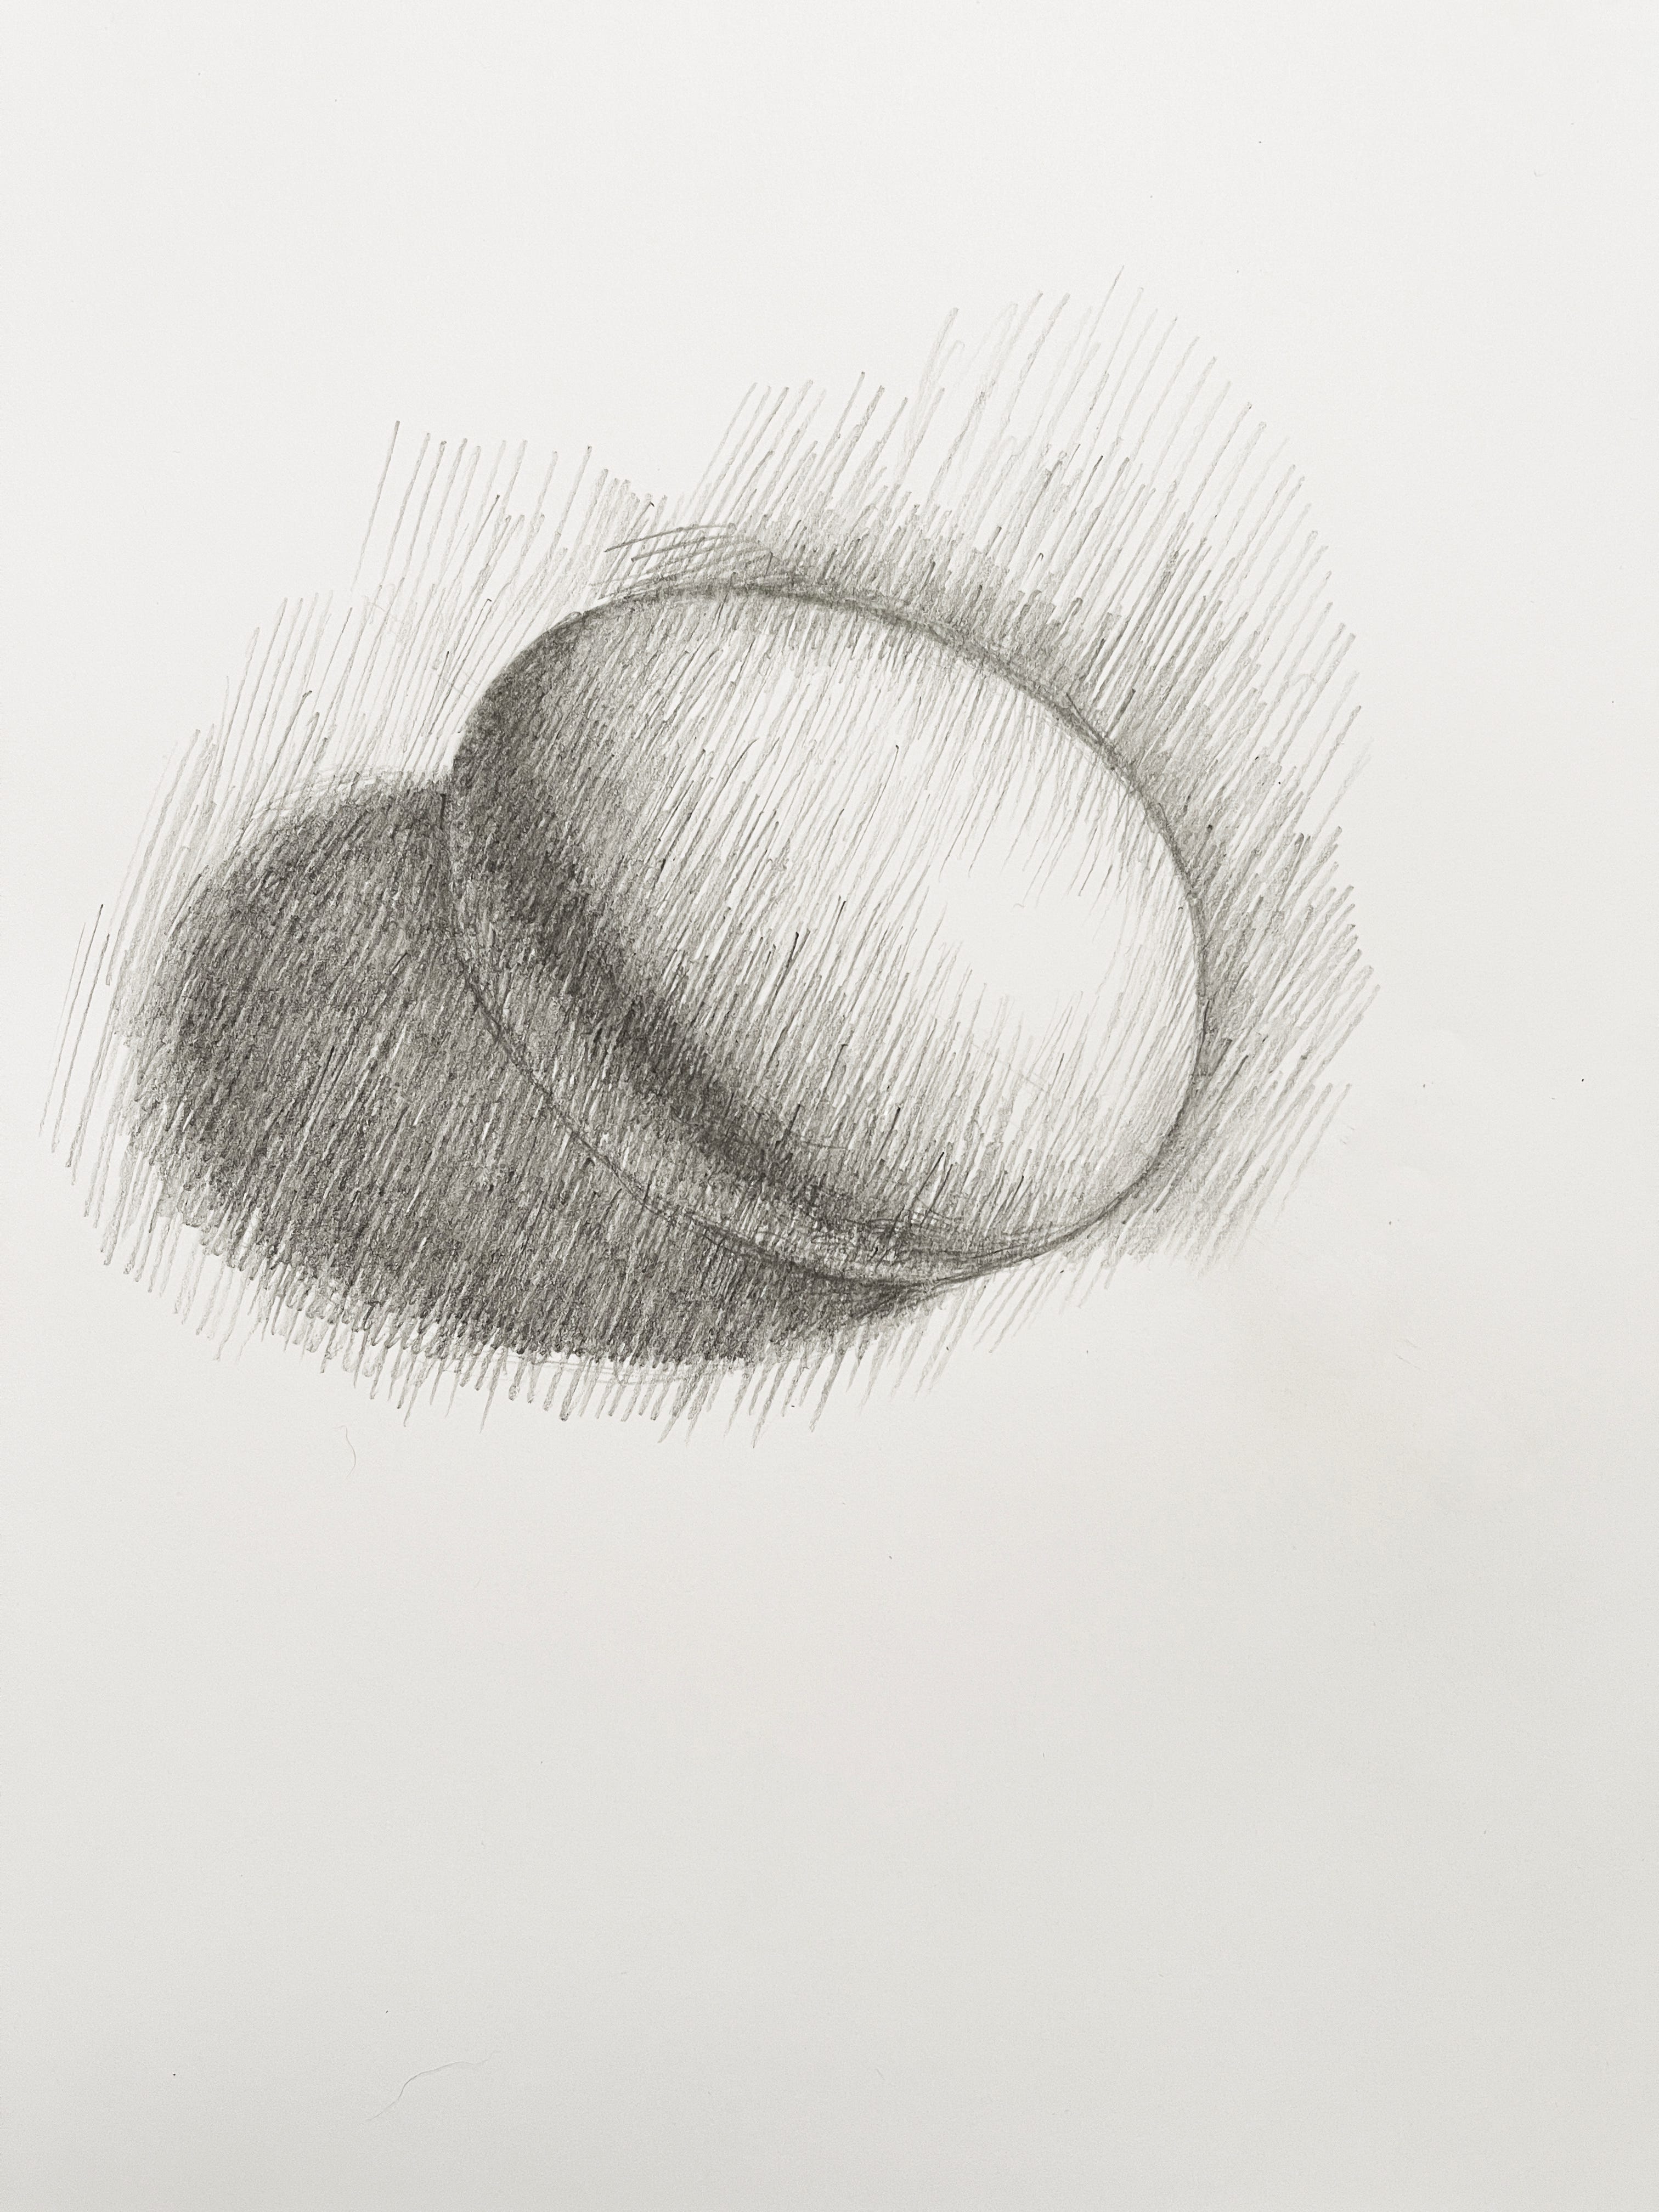
This famous portrait of the Mona Lisa by Leonardo Da Vinci utilizes all the elements that enable light to flourish in art. It involves six key elements: mid-tone, highlight, core shadow, reflective light, cast shadow, and negative space. But to keep this lesson simple, I will use a drawing demo of an egg—it will be much easier to see the different elements. Don’t be fooled by the egg’s simplicity: it is the elements of light and shadow that we will focus on. By harnessing these elements, you can watch your art improve dramatically.
Six Key Elements of Light and Shadow
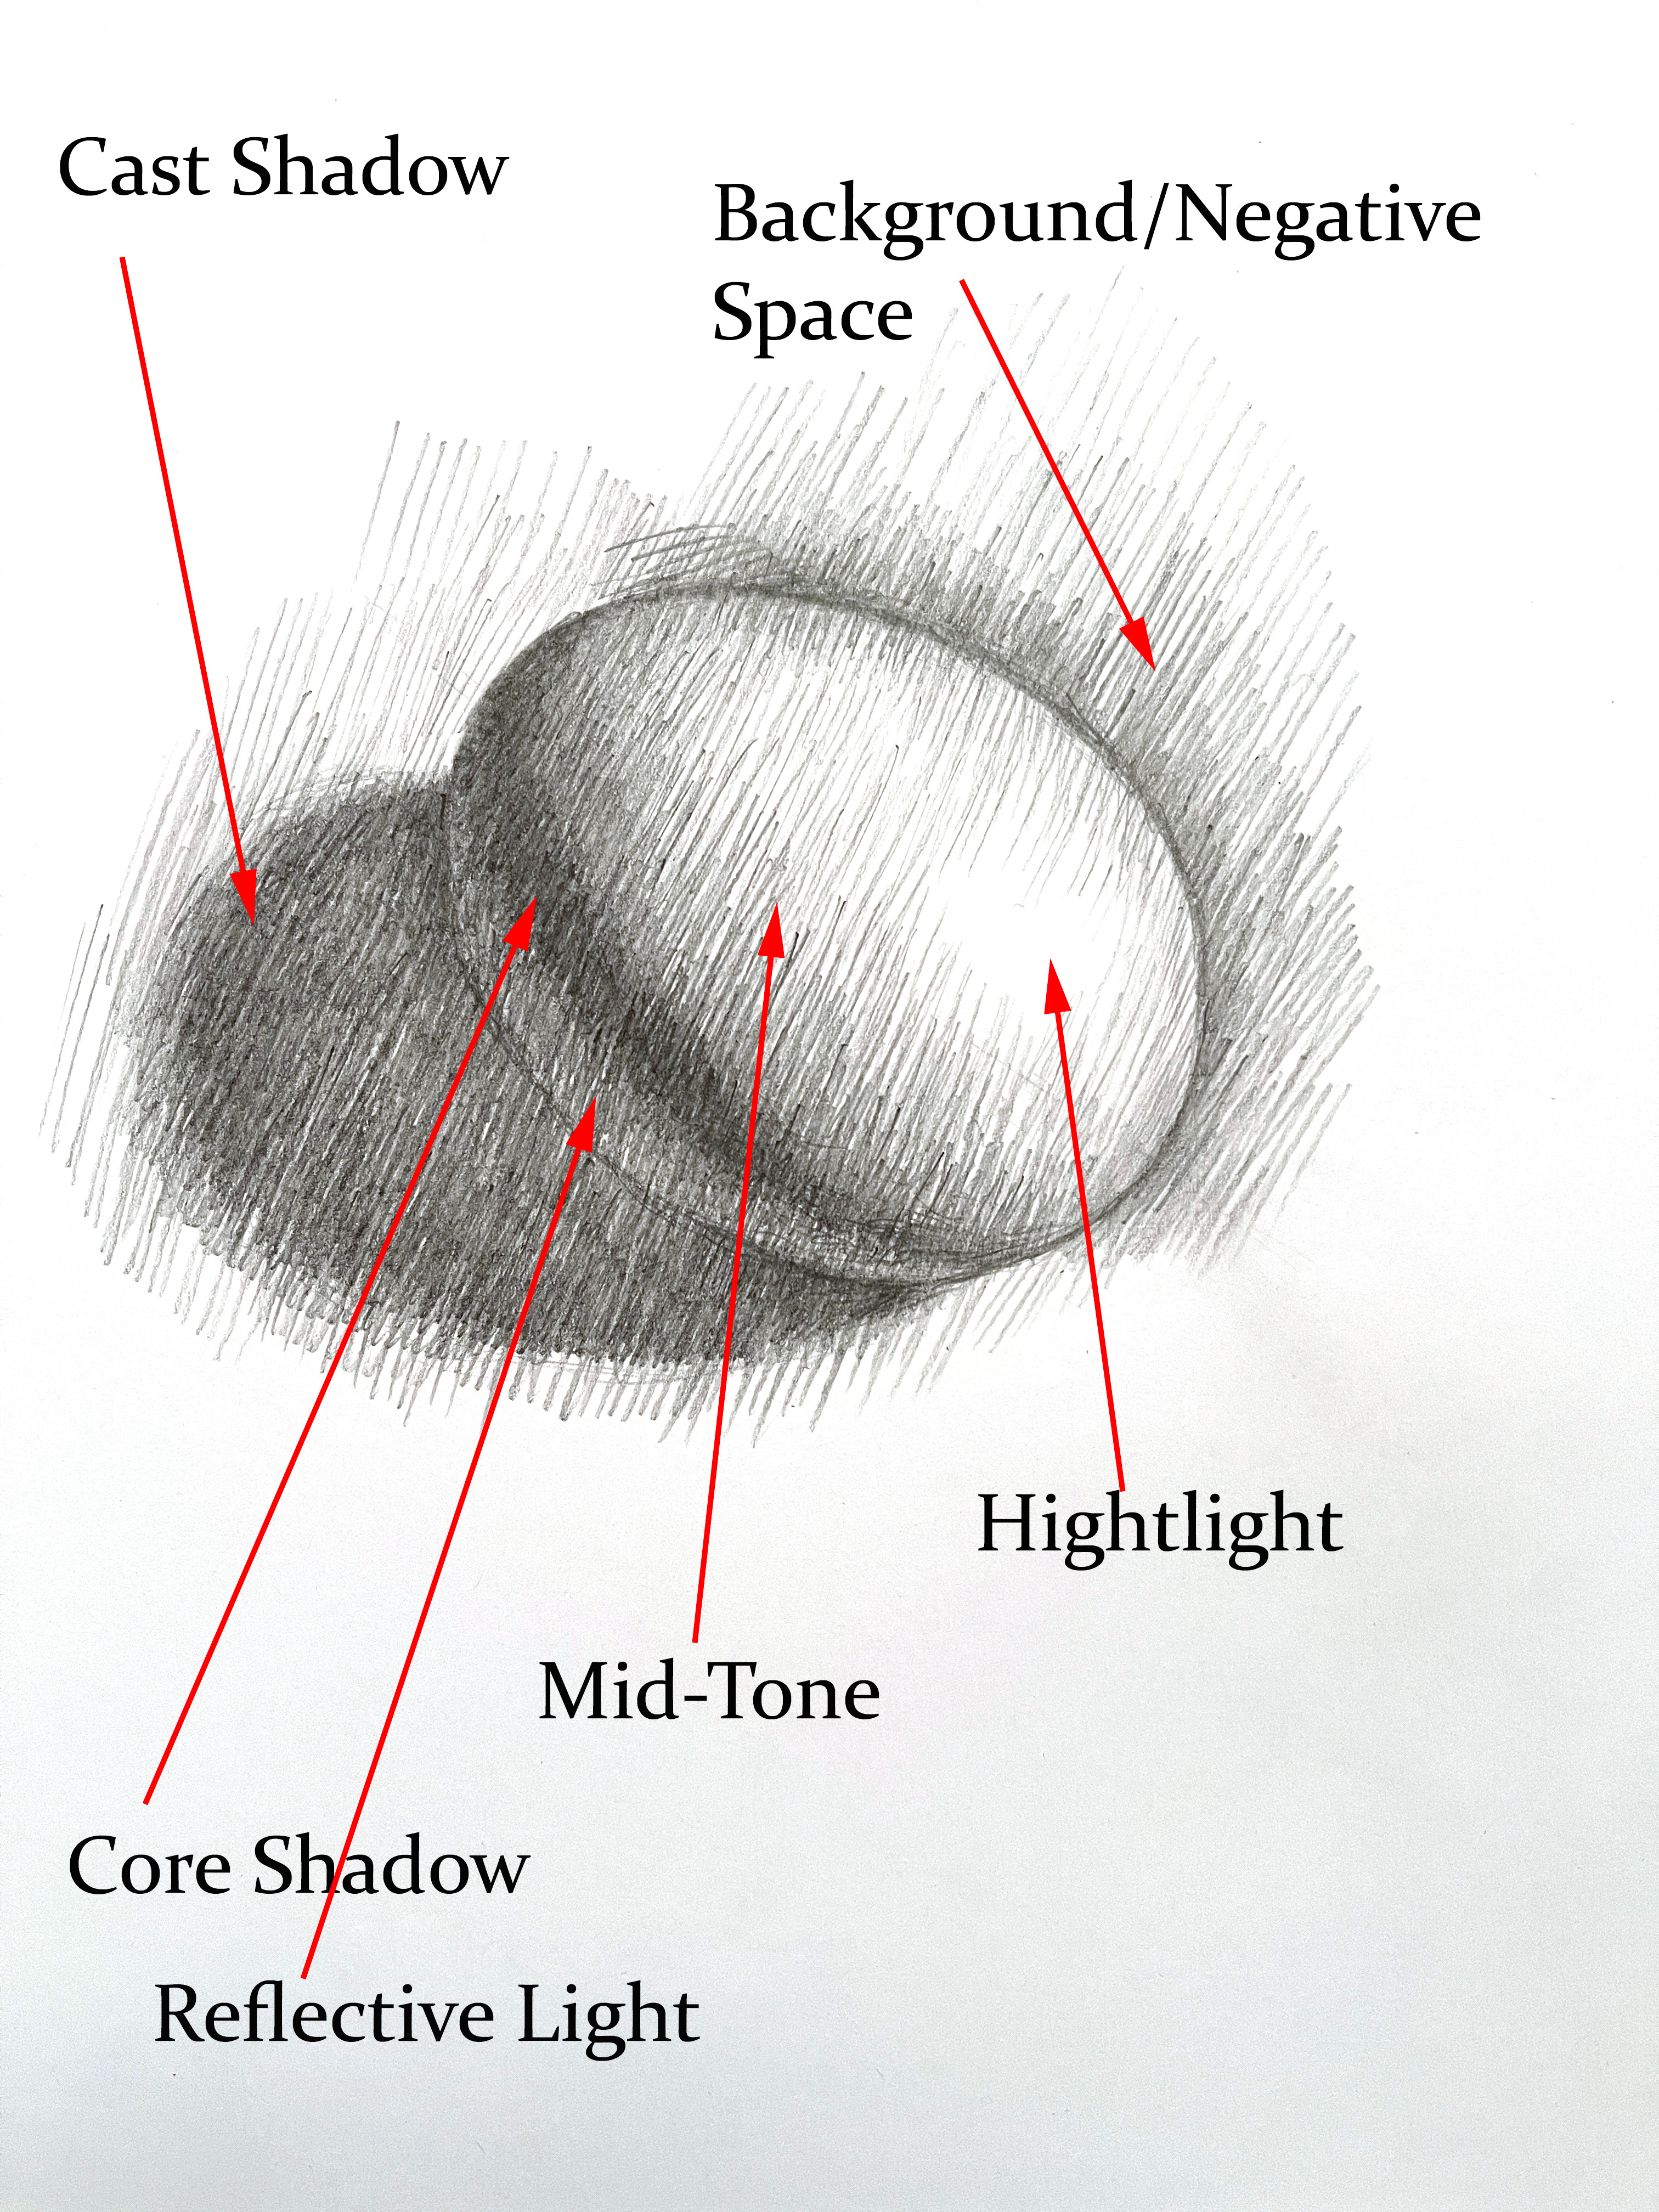
A 3/4s light is falling on the egg drawing example below. This means that 3/4s of the object is directly lit and the rest of it is in shadow. There are six elements: highlight, mid-tone, core shadow, reflective light, cast shadow, and background/negative space.
On the light side are the mid-tone and the highlight. On the shadow side are the core shadow, reflective light, and cast shadow. The last element is background/negative space, or atmosphere, of the setting which can shift from light to dark.
1. Mid-Tone: The tricky part is to mold your mid-tones so they accent the form of the object. It is crucial to round the shapes with your mid-tones. A good way to do this is by cross-hatching, which I will discuss later. Another good way is to think of the lit side as a glowing sun that fades from the bright highlight and gets darker until it merges with the core shadow.
2. Highlight: To be effective, the highlight must pop like a star! It should be many tones lighter than the other tones.
3. Core Shadow: The core shadow marks the boundary that runs along where the light ends and the shadow begins. This is perhaps the most difficult part to get right. It is not intuitive to darken an area inside the form of an object. By making it slightly darker, your object will appear more three-dimensional, and the feeling of light will be enhanced. It will give your art more power and realism.
4. Reflective Light: The reflective light compliments the core shadow and rounds off the form of the object. Think of it as the dim light of the moon compared with the sun, and it will give just the right sense of glow and form without competing with the light side. In other words, keep the indirect light mysterious, and it will invite the viewer into your work.
5. Cast Shadows: Adding a cast shadow is a powerful complement to the light. It gives a sense of object connecting to the ground as well as a sense of where the light is coming from. Try it on a dull work, and it will give a sense of drama and bright light.
6. Background/Negative Space: After you get the form looking great in the mid-tone section, you can give the object more of a dramatic presence by adding the atmosphere/negative space. It generally increases in darkness as it gets closer to the edge of the light area and does the opposite on the shadowed side: it’s a little lighter at the shadow edge and then fades away.
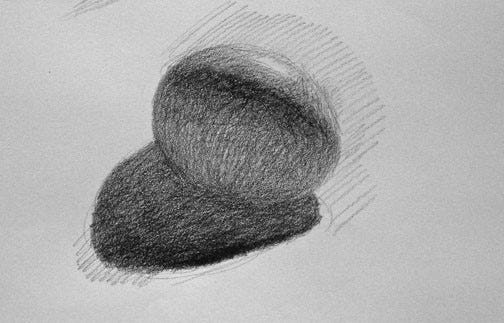
I included a sketch of egg backlit, and you will see that it has the same essential elements as the earlier drawing.1 About 1/5 of its surface is in light, while the majority is in shadow. The sliver of light has a highlight and mid-tone. The shadow area is dominated by a large reflective light area capped by a core shadow that skirts around where the light stops and the shadow begins.
The Mona Lisa Is a Textbook on Light and Shadow
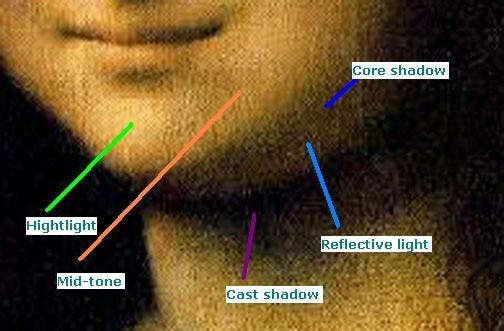
Leonardo da Vinci’s Mona Lisa is a textbook on how light falls on form. All the key aspects are here: highlight, mid-tone, core shadow, reflective light, cast shadow, and the dark negative space on the left side of her chin and neck.
Just as knowing anatomy is a great tool for figurative artists, knowing the anatomy of light is a phenomenal resource for creating form bathed in light.
Practice
As always, it is crucial to reinforce your understanding through practice. We studied the six elements of the anatomy of light. I recommend spending six hours or more on an egg drawing, focusing on each of the six elements until they are embedded in your consciousness. Set up an egg still-life with one source of direct light, and draw it from real life. It should look something like the photo below: Though you can use the photo, drawing from real life is more tangible and will have greater impact.

Tips
Do not drag your palm across the paper, blurring your pencil marks. It is a difficult skill not to rest your drawing hand on the paper.
Be comfortable in shading with parallel lines, like da Vinci. I don’t like blending in drawing; it's my taste. Instead, I like keeping the mark-making clean lines. Parallel lines are also very effective in ink and pastel drawing.
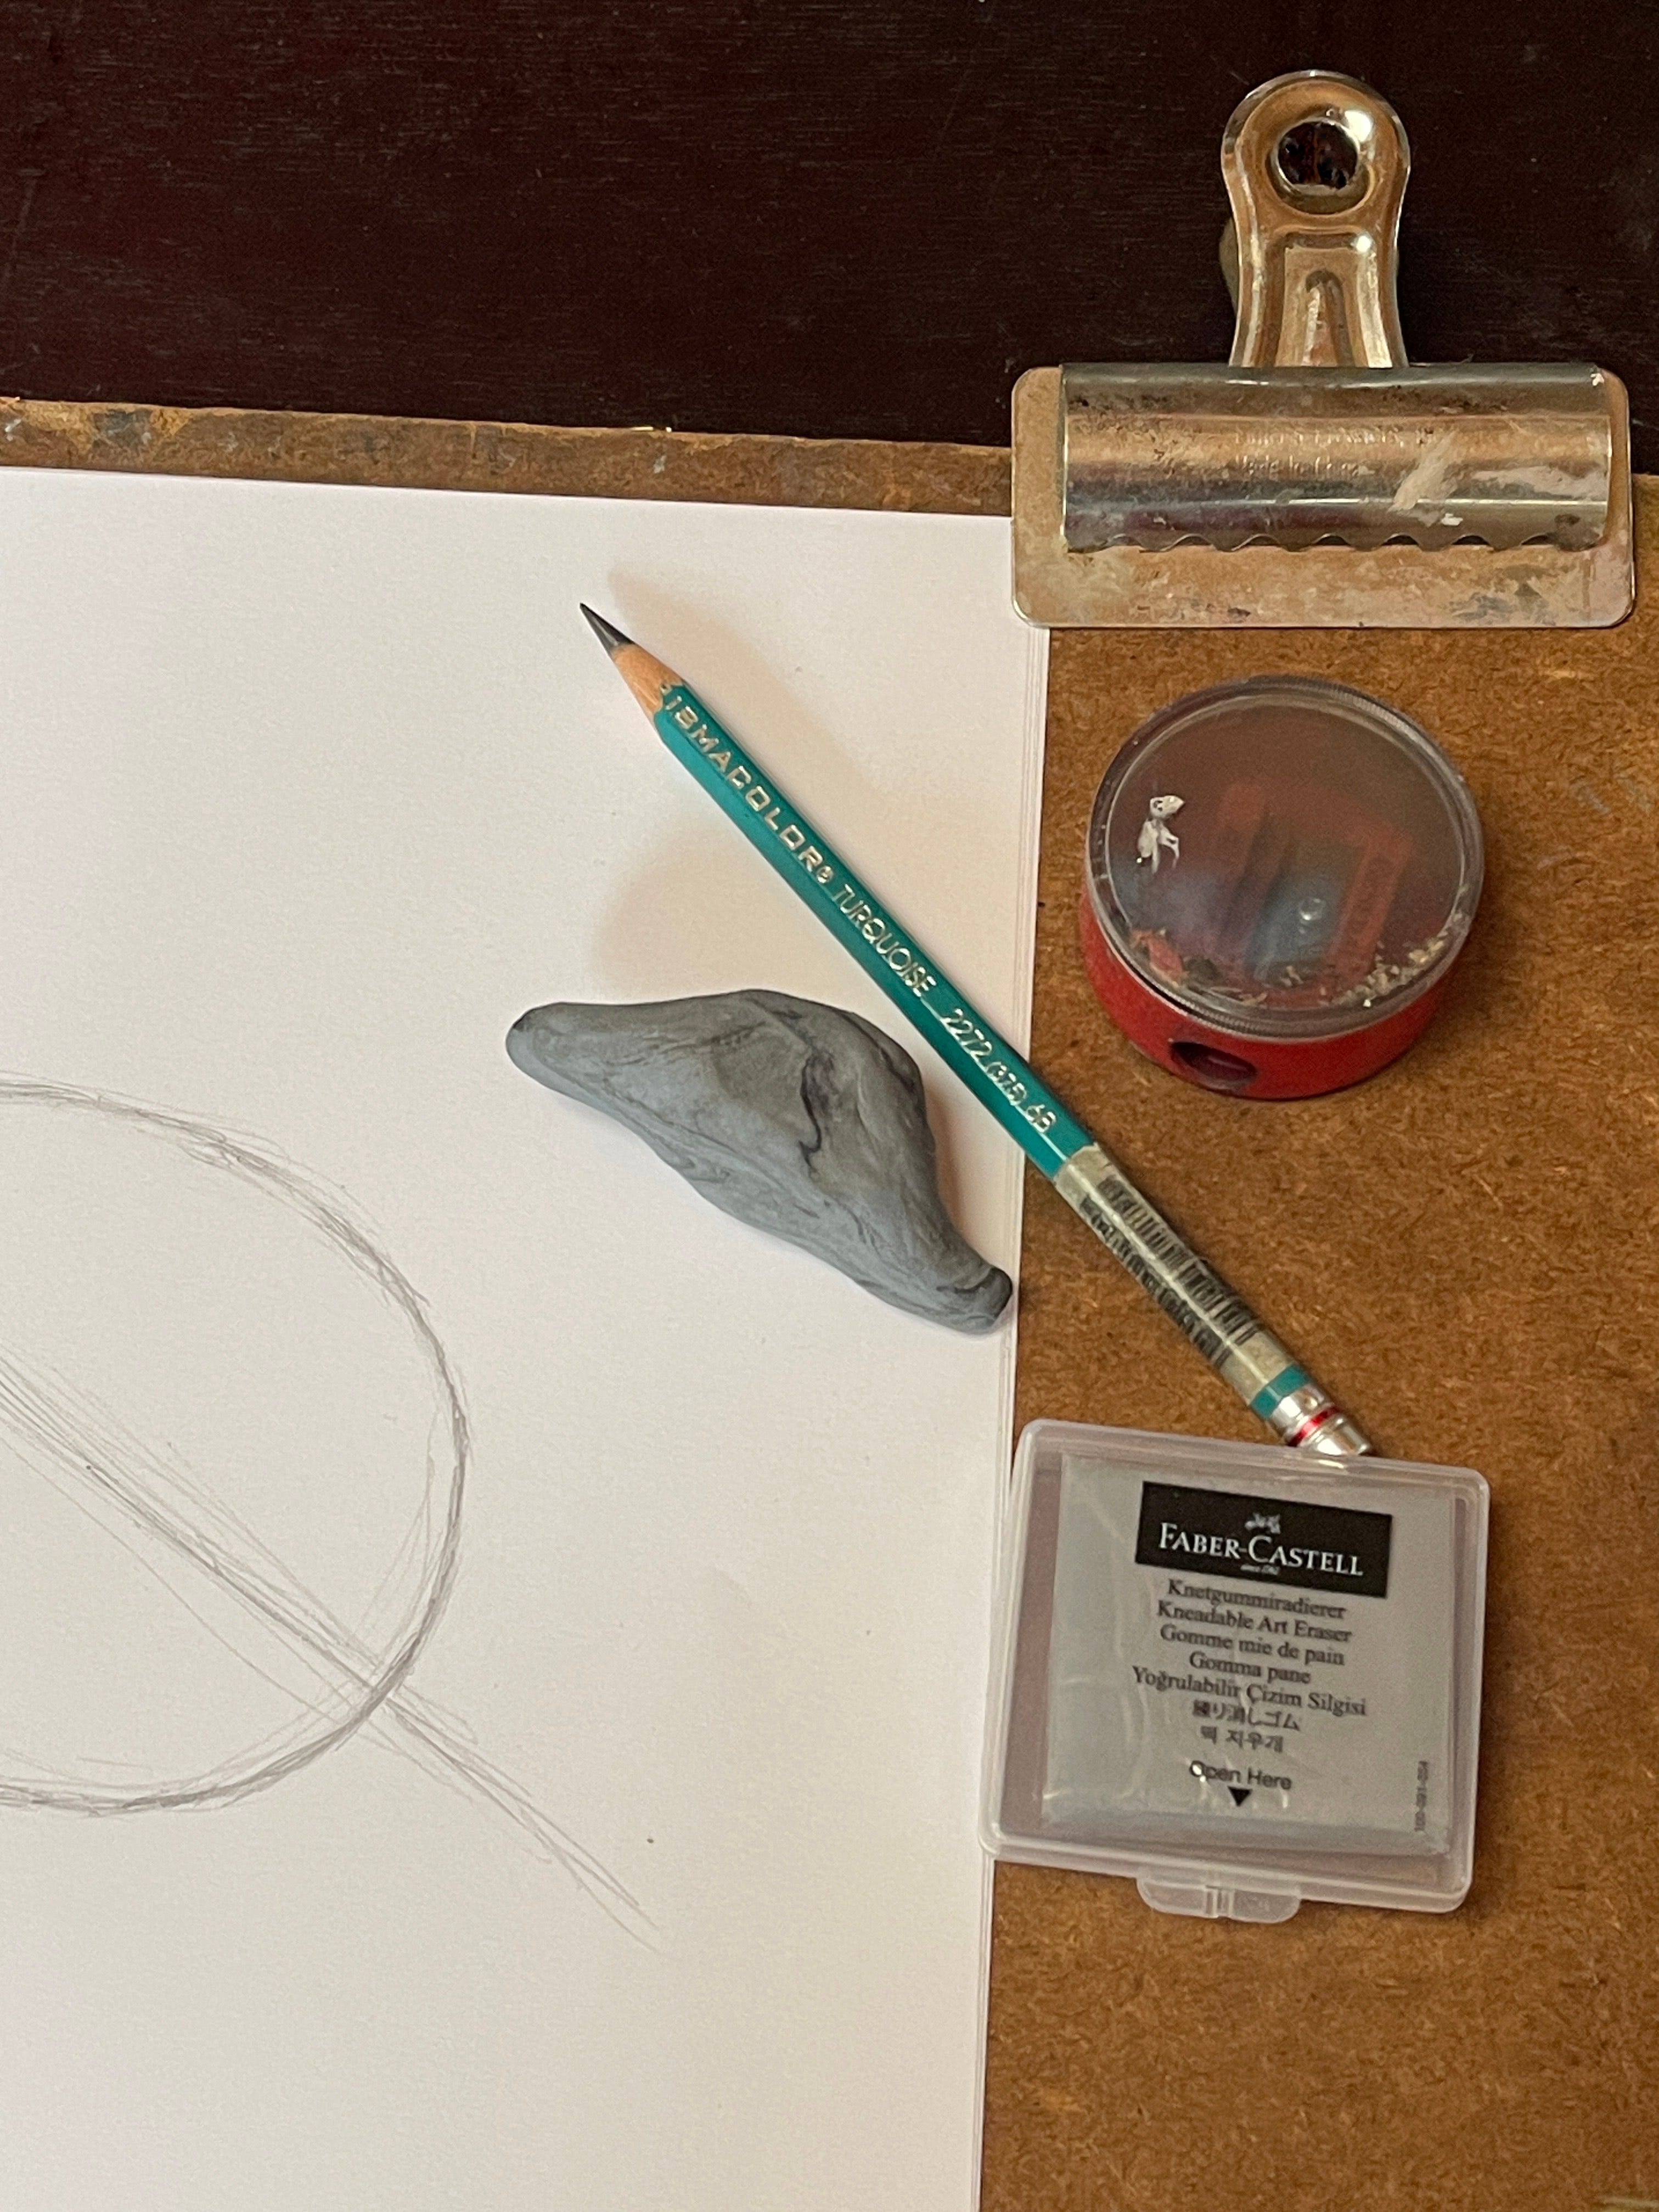
Supplies
Paper
Drawing Board
Metal Clips, to hold the paper in place
6 B Graphite Pencil. I like 6B, soft and darker, because it helps you vary your light and firm touch.
Faber-Castell Kneaded Eraser
And a Pencil Sharpener. Electric is fine if you have one you like. But the little plastic manual one works for me. Classical artists use an exacto knife or a box cutter, and sandpaper. I get a little nervous having a box cutter laying around to cut myself on by accident.
Historical note: backlighting is a device that William-Adolphe Bouguereau often used to light his people. Disney films also tend to rely on a similar device to create a silver lining effect.
Fabulous work from you here; am looking forward to more even though I’ve been an artist “behind the scenes” since 1963, dipped in and out of the Cleveland Institute of Art, Art Student’s League, spent a year as an art major at Kent State*, AND had been admitted to Tyler School of Art, RISD, & Parsons.
So why “behind the scenes”? Have been practicing law /still do but am in midst of “emerging” and planning a Substack here, galleries in Smugmug and other places, and a run for Art Basel, etc.
*Irrationally Chickened out being far away from home, then May 4, 1970 happened at Kent State & I left never going back to any art school because back then I could not figure out how to make a living as an artist. Now I think such questions are much easier to answer for a wide variety of reasons.
I am sure I can learn a lot from you!