Chapter 8, Perfecting Ellipses: Giving Your Still Life Wings
From my upcoming new edition of The Art Studio Companion
Don’t Start a Still Life Without ‘Em
In this study, we look at creating flawless ellipses.
Drawing ellipses is an essential skill that can transport your viewers to a world of harmony and serenity. Perfectly drawn ellipses of the rims and bases of plates, glasses, and bottles will take your artwork to a whole new level. Though it requires technical precision, mastering ellipses will exude confidence and give your artistic expression wings.
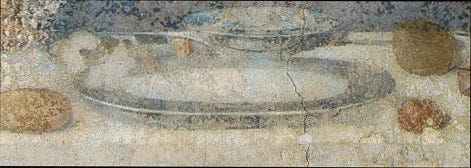
69 Da Vinci, The Last Supper, detail, 1498. WC.
Da Vinci painted and drew sublime ellipses. This detail shows the plate that’s in front of Christ in The Last Supper.
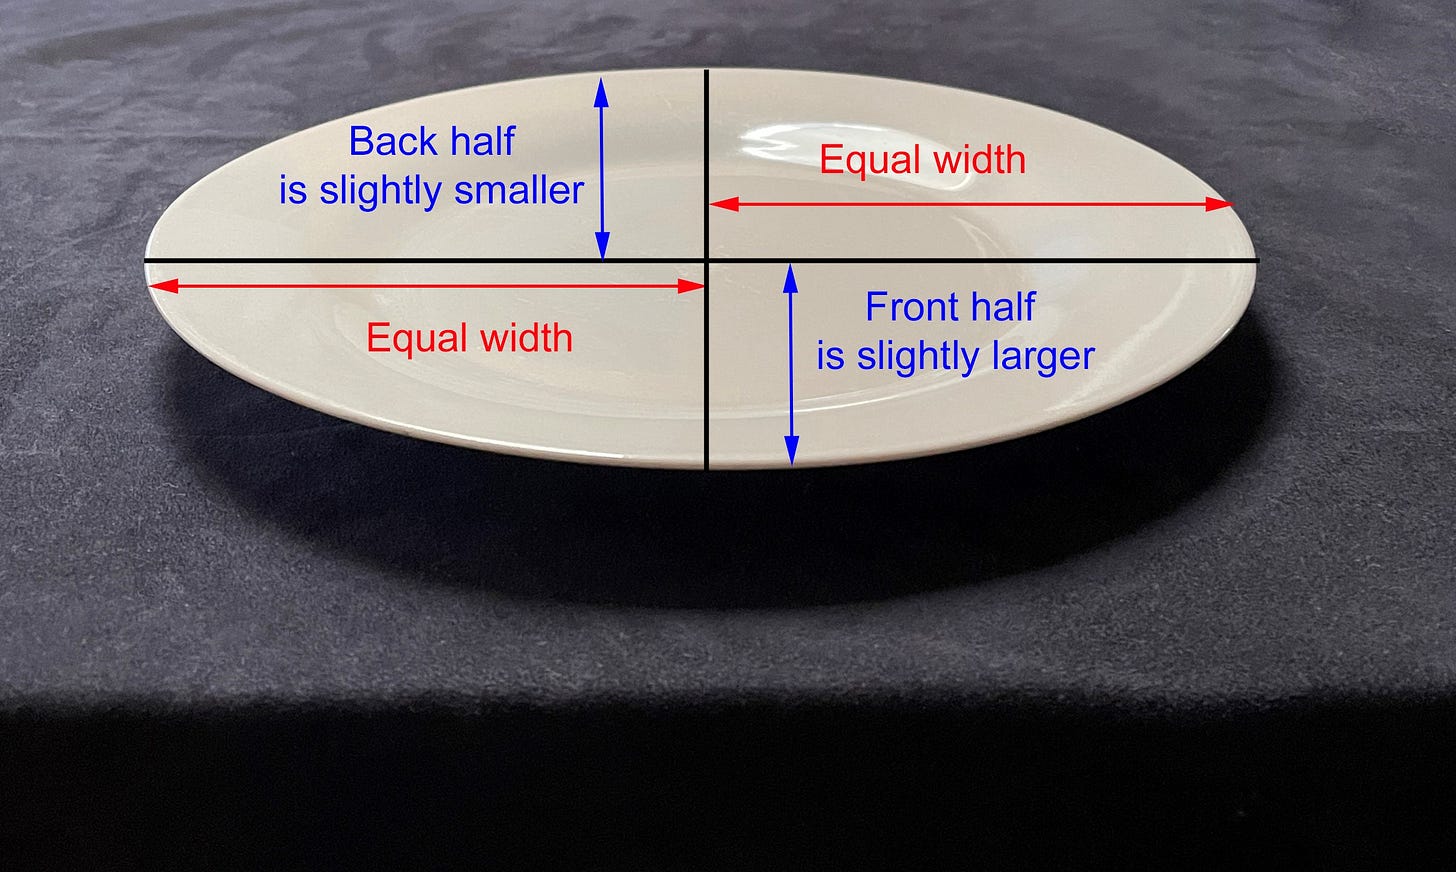
I've found the easiest way to draw ellipses is to make a cross, ensuring the two sides are equally distant. The top half is slightly smaller than the bottom half. Then, draw curving lines as similar as possible, connecting those four points.
70 Da Vinci. With my markup, the ellipse's sides are equally distant
71 Newberry. Demo: This photo depicts a plate with a cross dividing it into quarters. The left and right sides are equally distant, though the top and bottom have slight differences in size; the top half is slightly smaller.
A tricky aspect of ellipses is the slight discrepancy in size between the back half and the front half of the plate. This is due to natural perspective, as discussed in Chapter 6. In perspective, the front of the plate appears to expand as it comes towards us and diminishes as it recedes.
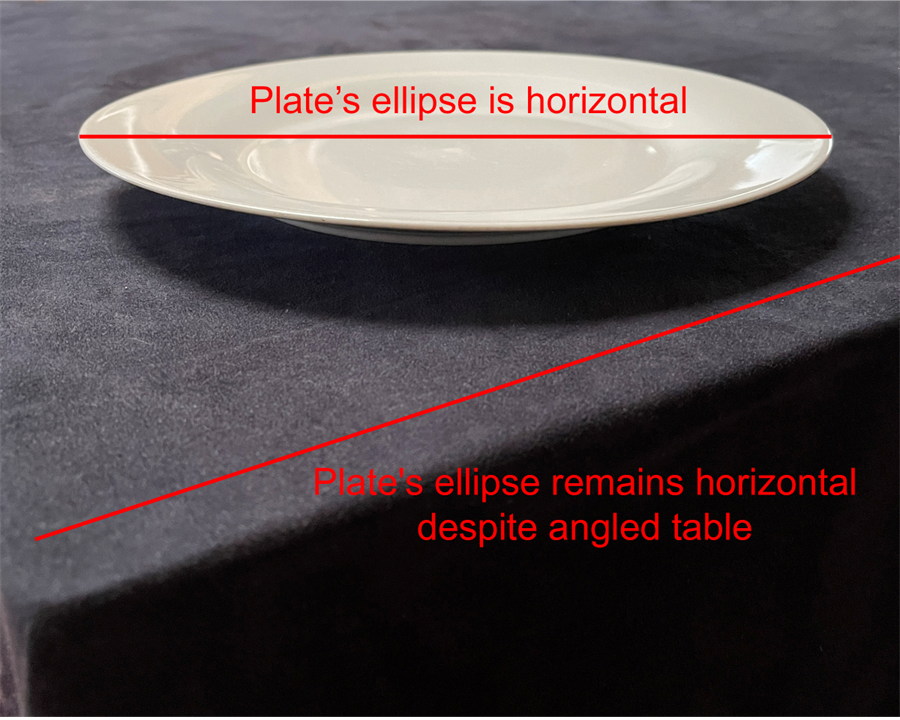
In The Last Supper, the edge of the table is horizontal, which might lead to confusion about the horizontality of the ellipse. However, regardless of the table's angle, the plate would always be perfectly horizontal, as demonstrated in Demo #73 and #74.
73 Da Vinci. With my markup. Plate stays horizontal even if table is turned.
74 Newberry. Demo that the plate’s ellipse remains horizontal despite the angled table.
If we sit at an angle to the table, its edges will also become angled. However, the ellipse of the plate remains horizontal, unaffected by the table's orientation.
This phenomenon is attributed to the geometric properties of circular and rectangular forms. The circular form of the plate's ellipse maintains its horizontal orientation regardless of the angle at which it's viewed because the ellipse retains its inherent shape. In contrast, the rectangular form of the table's edges changes when viewed from an angle, as rectangular shapes appear to change in perspective depending on the viewer's viewpoint.
Above and Below Eye-Level
75 Newberry. Demo of ellipses above and below our eye-level.
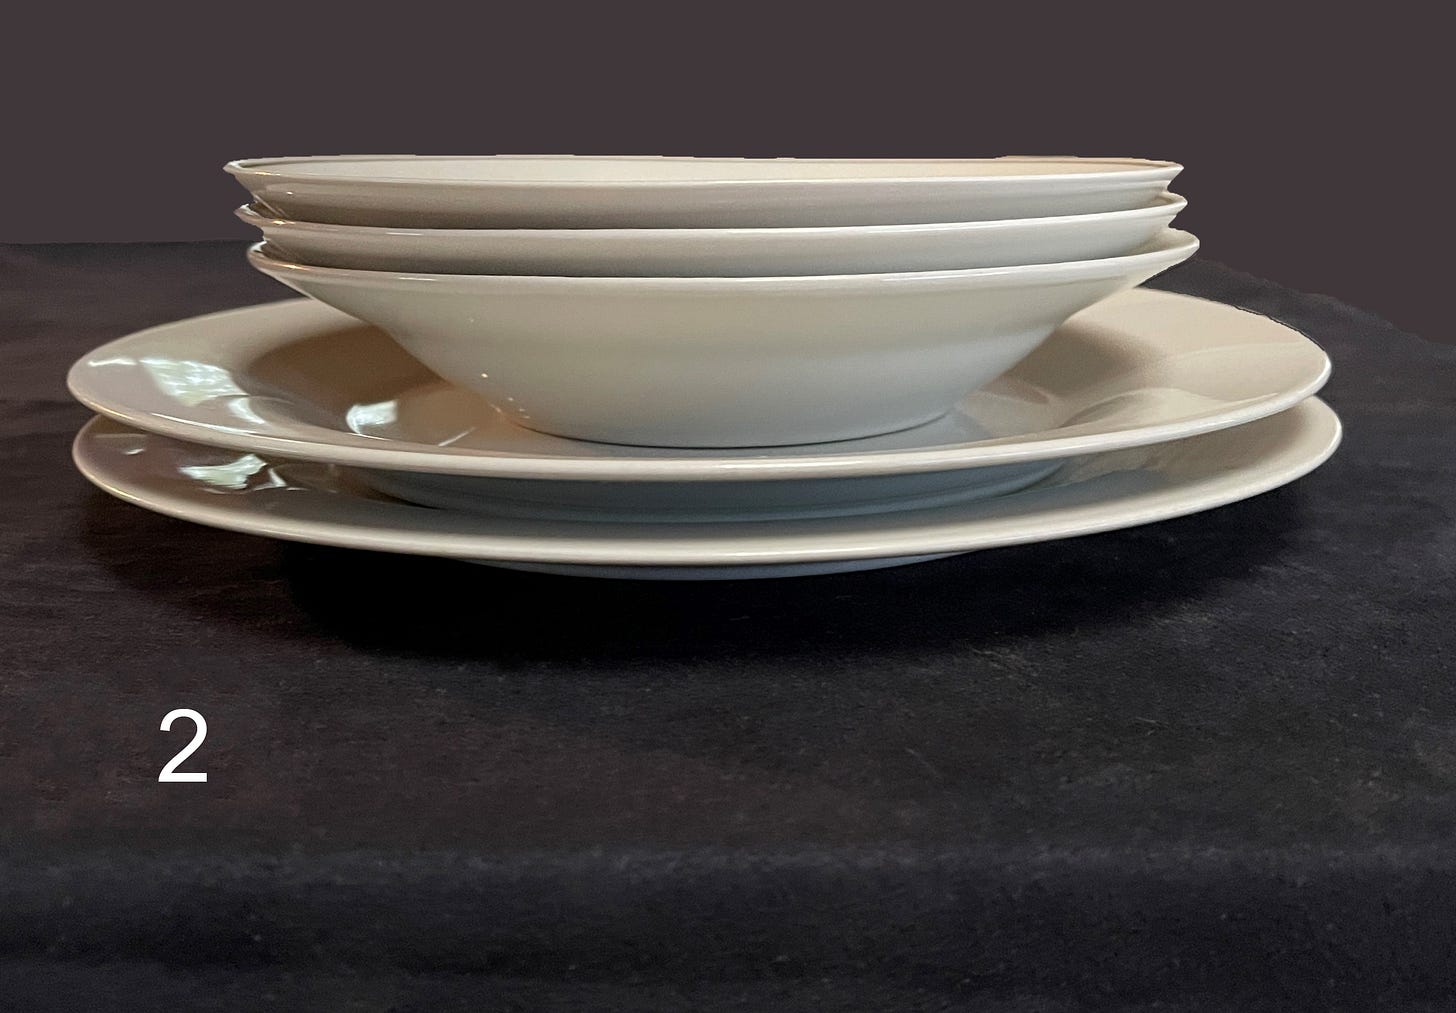
The last important thing to know about ellipses is that the rim gets progressively rounder, more circular, the further they are above or below our eye-level. Shown in Demo #75. “Eye-level” is literally the same height as our eye. Think of your eye’s height as a waterline: above it, the ellipses curve over; under it, they dip like a “U” or a smiley face.[1]
76 Newberry. Demo: Three views of ellipses of dishes.
Real Life Ellipsis from Below to Above
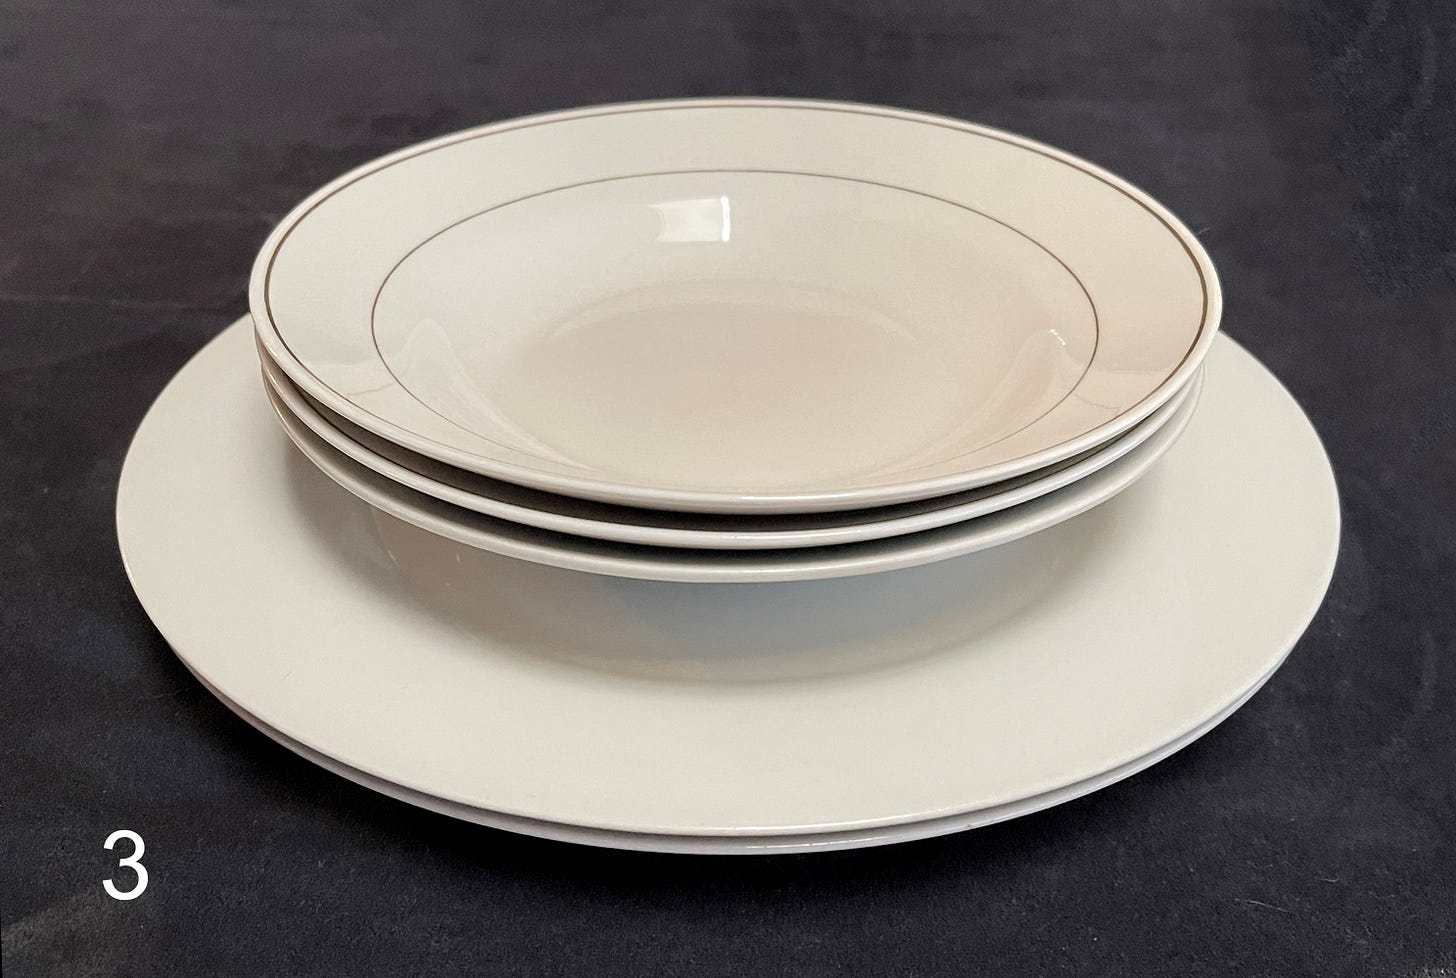
Demo #76 demonstrates real-life perspectives of the dish’s ellipses:
1. The top picture shows the view looking up to the dishes from below and consequently the arches of the dishes' rims.
2. The middle picture shows that the ellipse of the top dish is neither arched nor dipping—it remains horizontal. While the ellipses of the lower dishes begin to dip.
3. Lastly, we see the view looking down on the dishes, similar to the da Vinci perspective. Consequently, their rims dip like “smiley faces.”
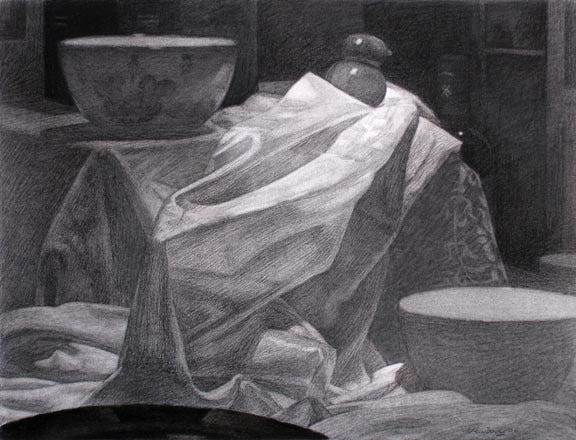
77 Newberry, Himalayan Flight, 2006, charcoal on Rives BFK, 19x26".
In my charcoal drawing, Himalayan Flight, I used the dishes' ellipses symbolically. A Himalayan monk gave a white silk prayer scarf to a mountain climber friend, which was then passed on to me. I incorporated the idea of ascending to the heavens, using the dishes' ellipses as symbolic representations of the orbits of planets.
Notice that the lower the ellipses are on the page, the wider their dipping curves; conversely, the higher they are, the narrower the band of the ellipse. The top of the still life was slightly below my eye level. It was very hard work to get the ellipses right, but once they were in place, the whole drawing took off. It was well worth the effort.[2]
Drawing ellipses is an essential skill that can transport your viewers to a world of harmony and serenity. Perfectly drawn ellipses of the rims and bases of plates, glasses, and bottles will take your artwork to a whole new level. Though it requires technical precision, mastering ellipses will exude confidence and give your artistic expression wings.
Practice
As always, it is crucial to reinforce your understanding through practice. In pencil, draw two drawings of a water glass with a focus on the ellipses of the rim and the base of the glass. Use the cross technique for both ellipses, as discussed at the beginning of this chapter.
In one drawing, you can sit at a table with a slight downward look at the glass, so that you can see inside the rim. The two ellipses of the glass will look similar to the lower half of the ellipse in Demo #74.
[Warning: It is counterintuitive and seems impossible, but the bottom ellipse of the base of the glass will have much more of a dipping curve. Your instinct, including mine, is to make the base of the glass a horizontal line. Under no circumstances do that!]
In the second drawing, lower your position so that your eye-level is in the middle of the glass. The idea is that you are looking up to the rim and down at the base of the glass. The upper rim will be arched, and the base will resemble a smiley face.
The goal is to match what you see to the theory. Enjoy the challenge—I promise it will be worth it. Your drawing will thank you, and your friends will be gobsmacked.
[1] Eye-level is also a crucial concept in perspective. It serves as a horizon line, representing what you would see when looking straight across. Objects below the line show their tops, while those above reveal their bottoms. I delve deeper into this concept in Chapter 19, Dynamic Spaces: Two- and Three-Point Perspective.
[2] Freedom in art is a product of mastery. As one gains proficiency in solving visual problems in drawing and painting, they acquire greater freedom. Without a solid foundation, limitations arise, hindering self-expression. For example, lacking the skill to draw hands may result in deformed representations, leading to frustration and avoidance of hands. Instead of being free to explore artistic subjects, one becomes boxed in. The idea of freedom without skill achieves the opposite effect.






Thanks Carol! 😀❤️💫