Chapter 7, One-Point Perspective: Eye-Level and the Vanishing Point
From my upcoming new edition of The Art Studio Companion
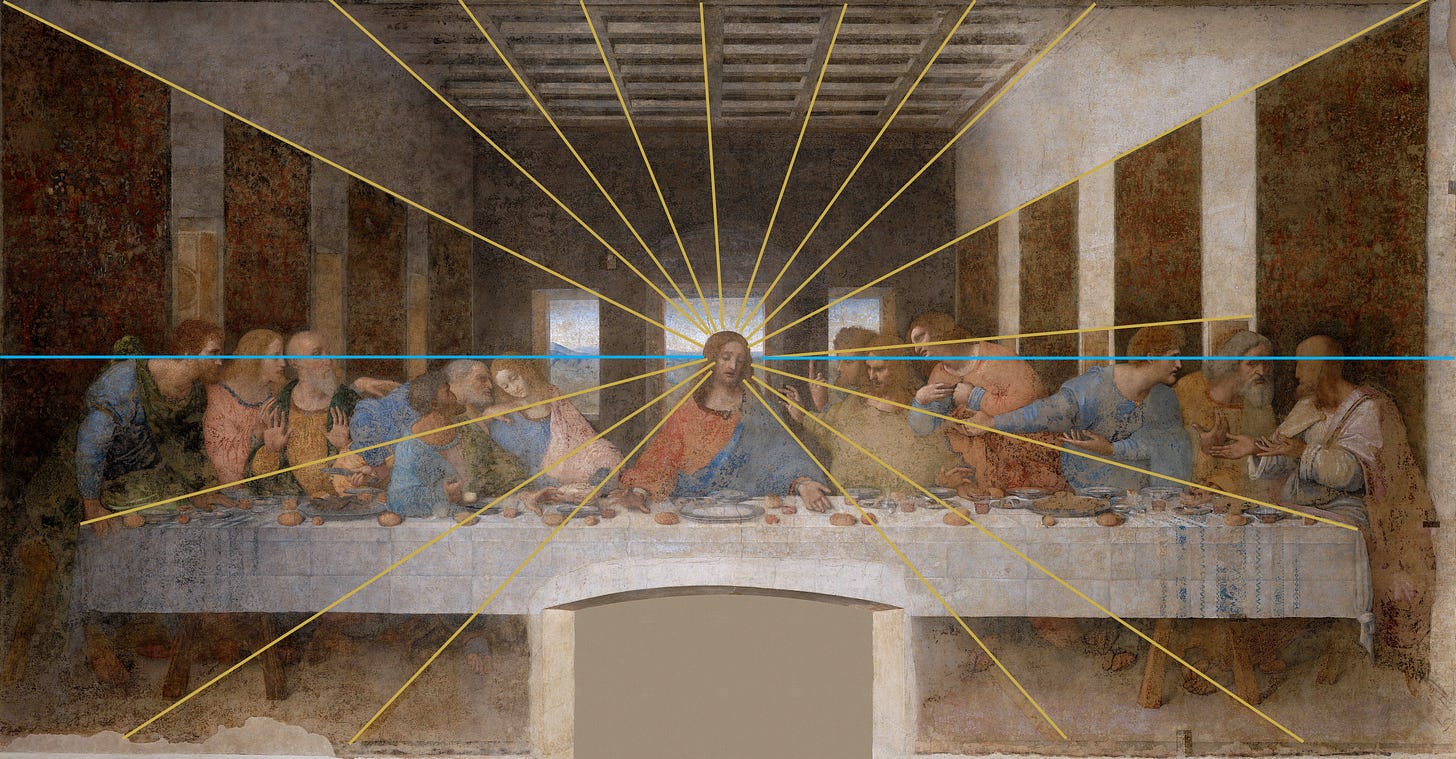
55 Da Vinci, The Last Supper, 1498. Santa Maria delle Grazie, Milan, Italy. WC. With my markup.
In this study, we delve into the basics of one-point perspective. One-point perspective is a spectacular art technique that adds drama to buildings, interiors, and corridors. And it is relatively easy to use once you understand how it works. One of the most famous examples of this technique is da Vinci's painting, The Last Supper.
Practice #1
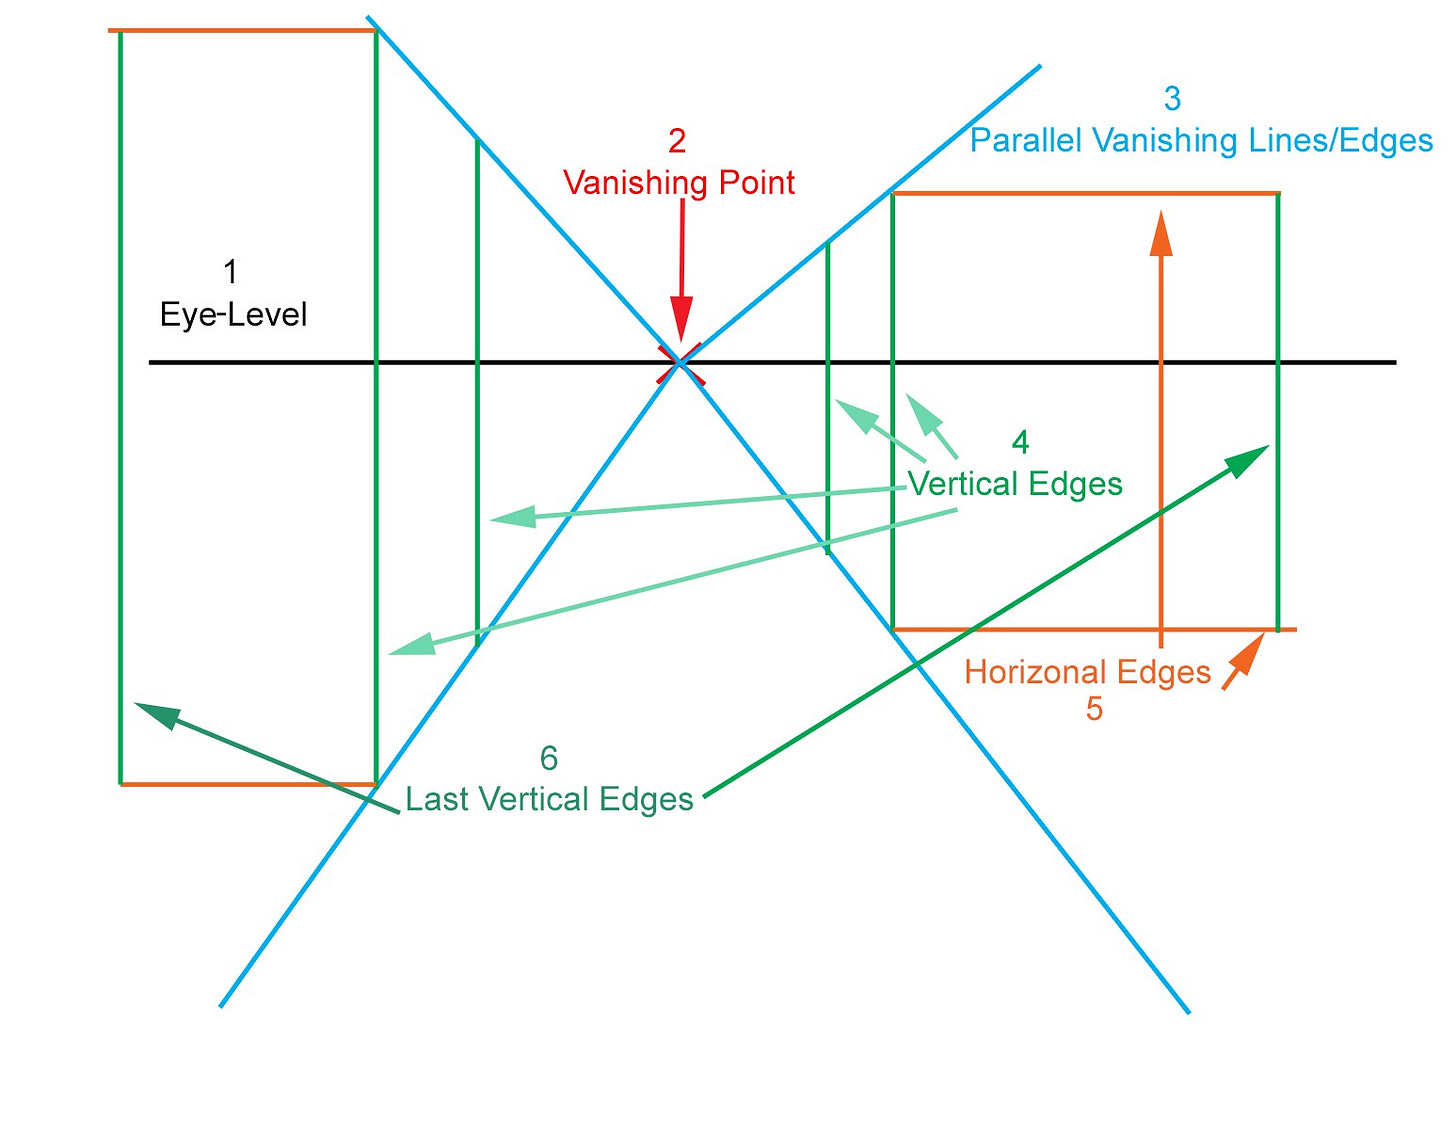
As always, it is crucial to reinforce your understanding through practice. Here, it is good to practice this demo as we go over it. There are six essential steps to drawing a one-point perspective in theory, and the steps don’t have to follow any particular order, but the easiest is to:
1. Draw a horizontal line on the page; this line is called eye-level or horizon line, colored black in my demo.
2. Then, close to the center, mark a dot on the eye level line; this is the vanishing point, in red in the demo.
3. From the vanishing point, draw a few straight lines radiating outwards, as wide or narrow as you like. These are your parallel vanishing lines, blue in the demo.
56 Newberry. Demo of one-point perspective showing the eye level, vanishing point, and parallel vanishing lines.
4. Draw a few vertical lines/edges connecting the upper and lower blue parallel vanishing lines, shown in green.
5. Then, draw a few horizontal lines from the intersection of the blue and green lines. Here I did that in orange.
6. Lastly, draw vertical line(s) connecting the two horizontal lines/edges. This is the basic theoretical setup.
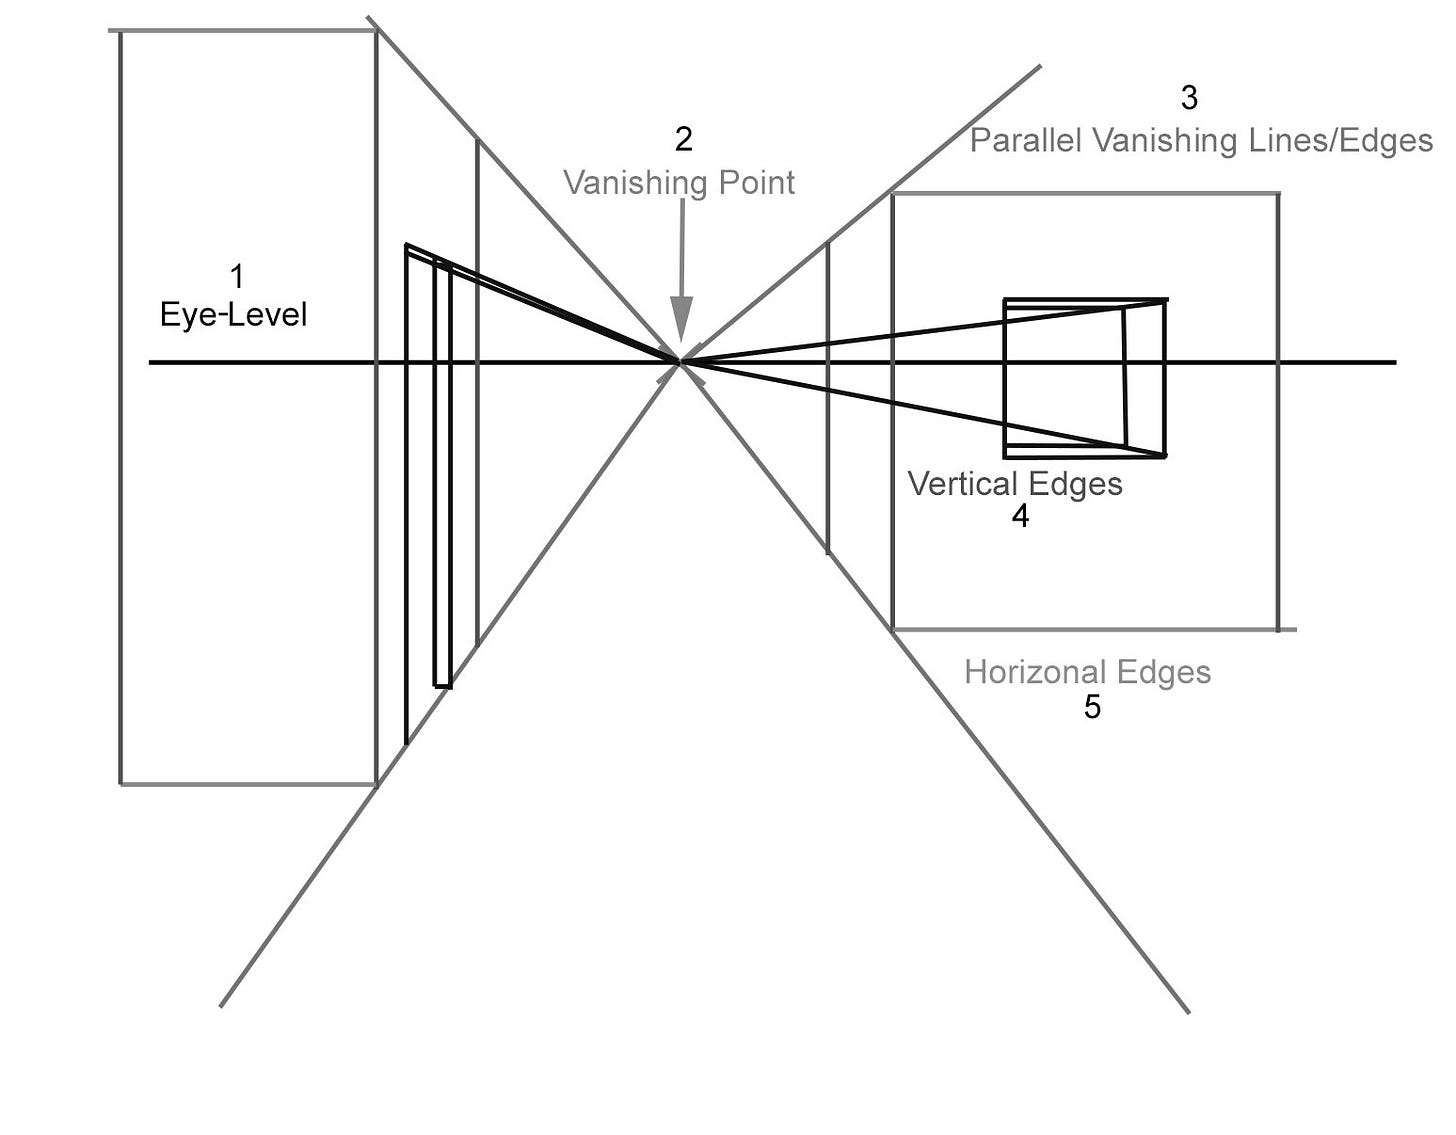
57 Newberry. Demo adding perfectly horizontal and vertical lines/edges to make cubes.
58 Newberry. Demo: Once the cubes are in place, you can experiment with adding a doorway and a window.
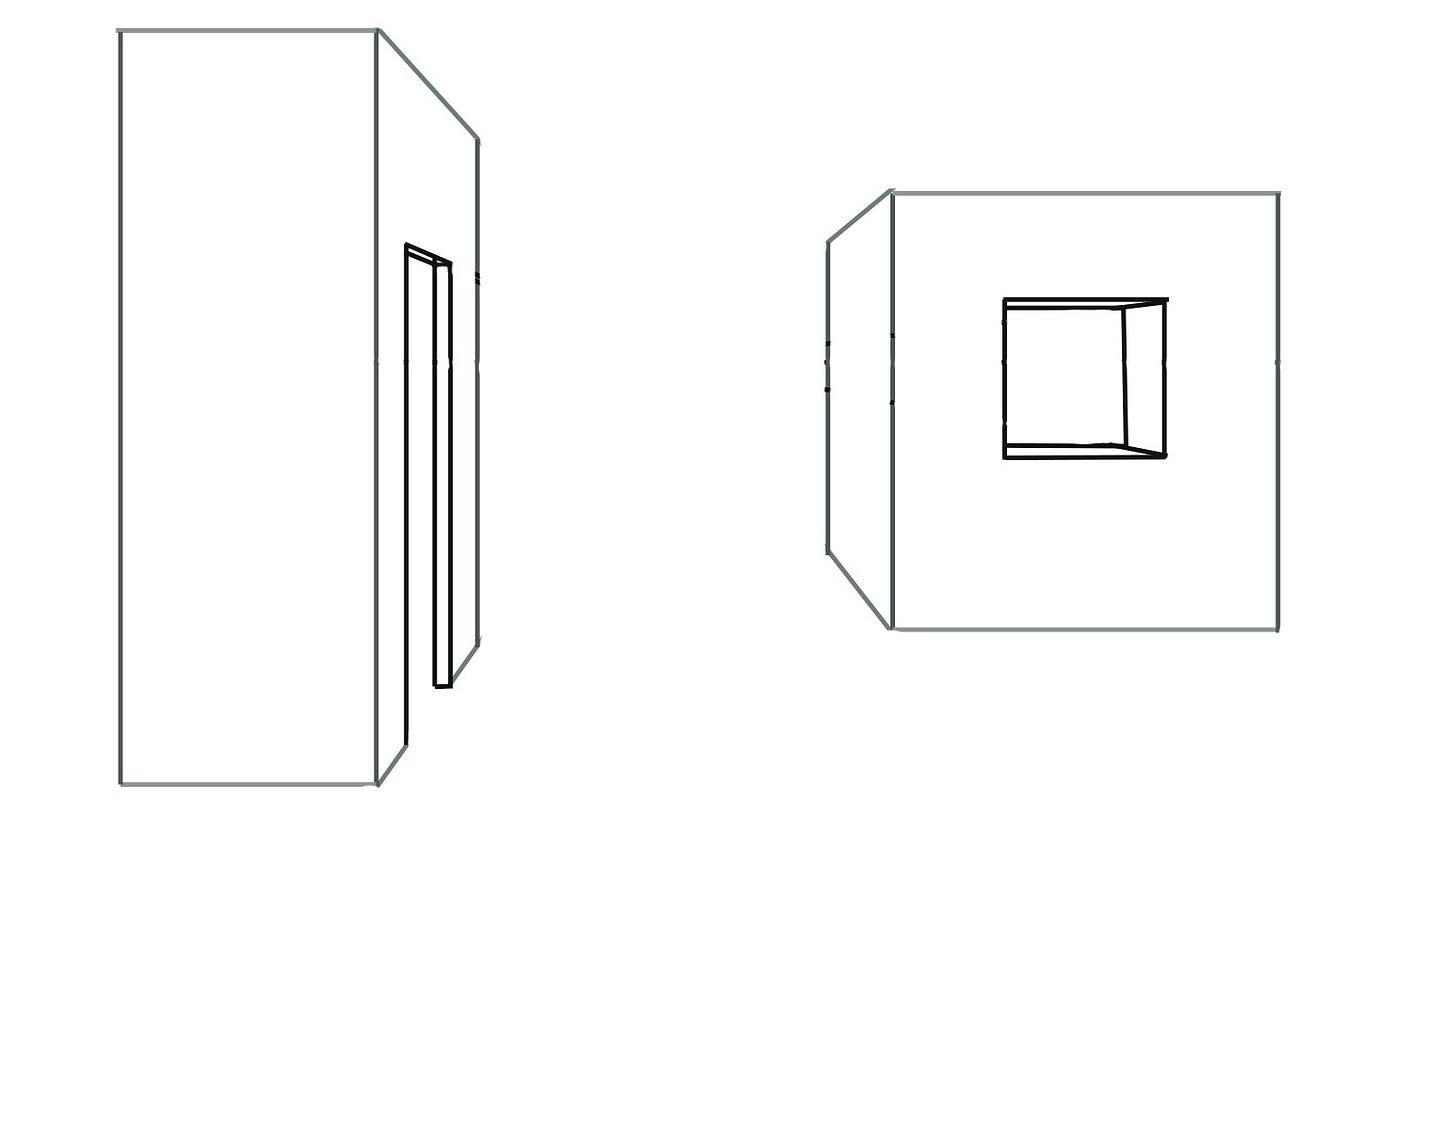
You can experiment and play with these six steps. You should be able to sense some blocks forming. After they have formed, erase all the guidelines, and hopefully, you end up with something like the following drawing. You should practice these three to five times or more until your blocks feel like natural-looking blocks. And if you added windows and doors, they should feel like Cycladic white houses.
59 Newberry. Demo: now erase all the guidelines and you should be left with natural-looking cube-like structures.
Practice #2
As always, it is crucial to reinforce your understanding through practice. Here, we will focus on the eye level, also known as the horizontal line, and combine theory with reality by drawing an interior room.
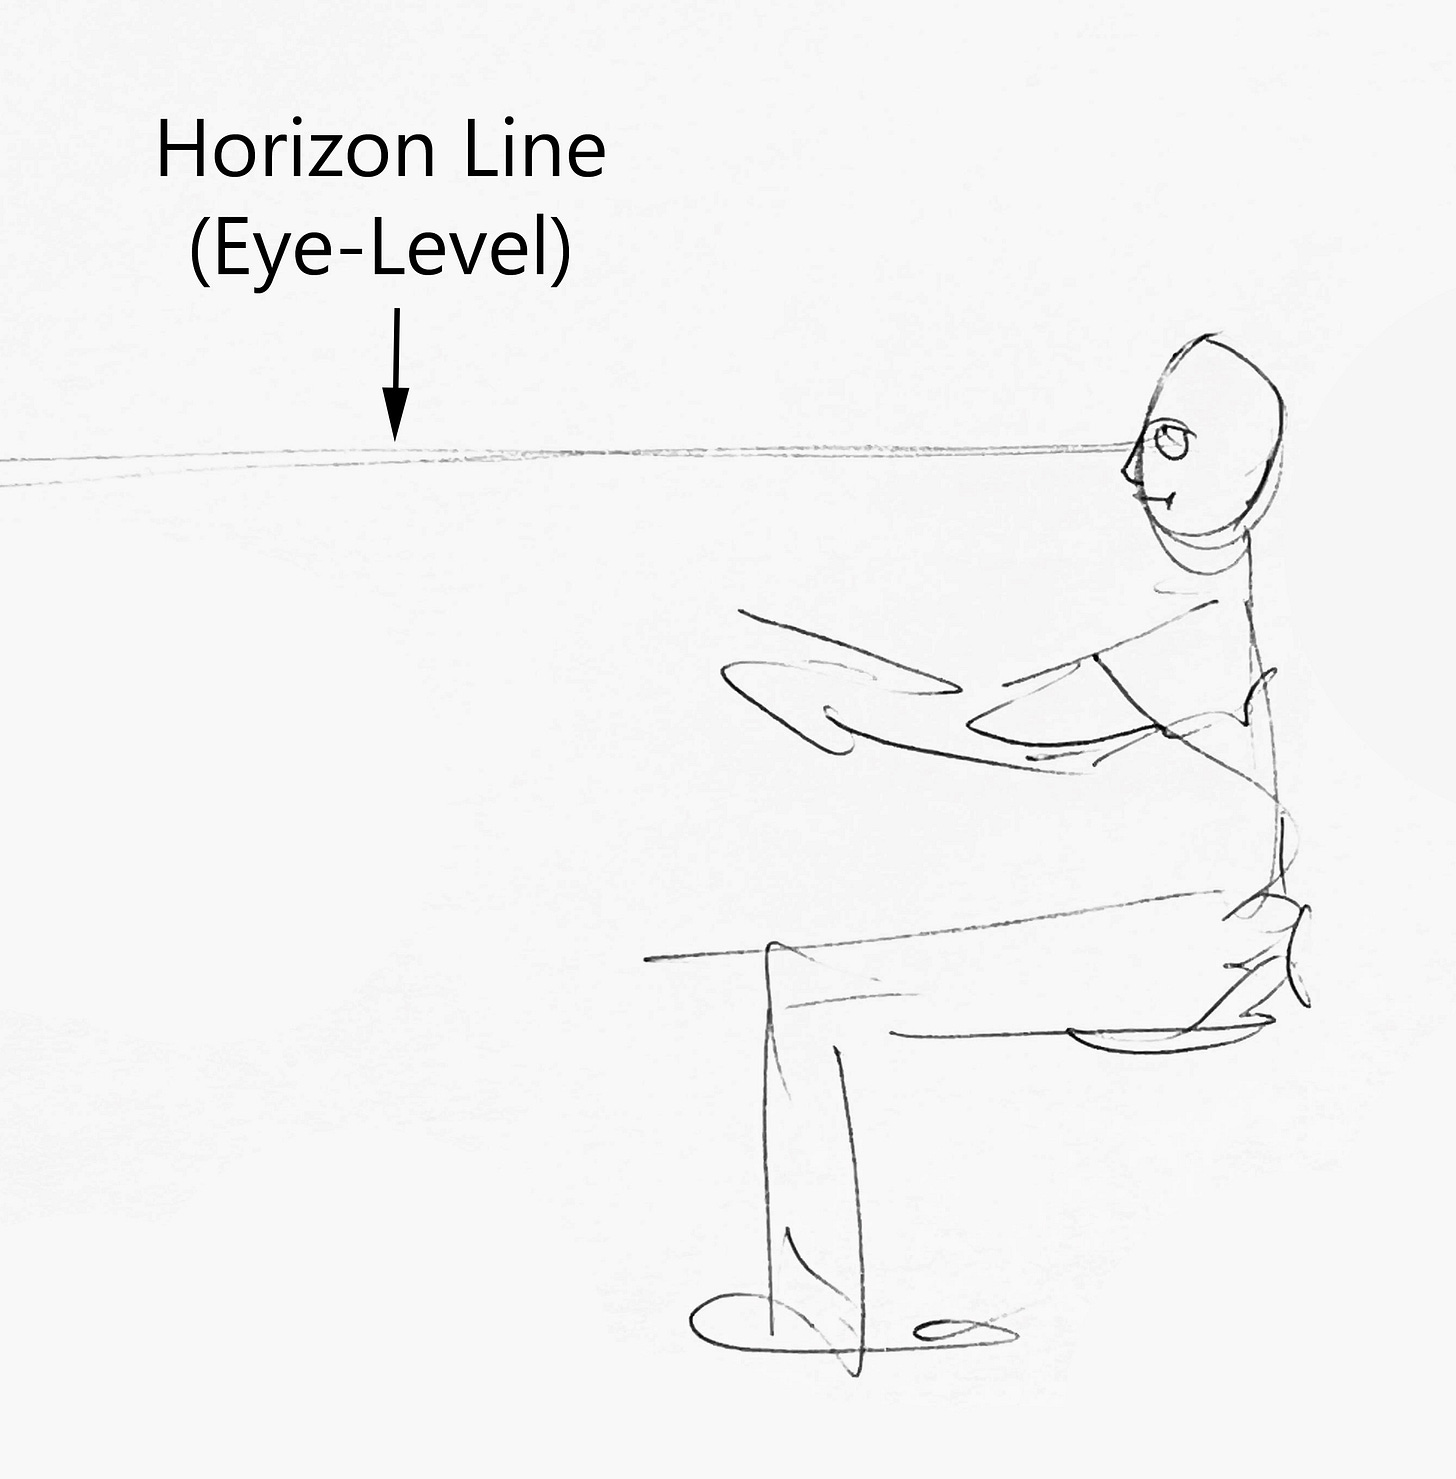
The eye level/horizon line refers to the literal height of the artist’s eyes. The eye level horizon line is constant and remains straight across at the height of the artist’s eyes, regardless of whether they look up or down. Practice drawing the interior of your home:
60 Newberry. Demo: Emphasizing that eye level is literally the height of your eyes above the ground.
1. When drawing from real life, it is important to note the height of eye level on the wall or scene the artist is drawing. If your eye level is literally 4 feet high in a sitting position, and you are facing an interior wall, the eye-level horizontal line will be 4 feet high on that wall. Top of Form
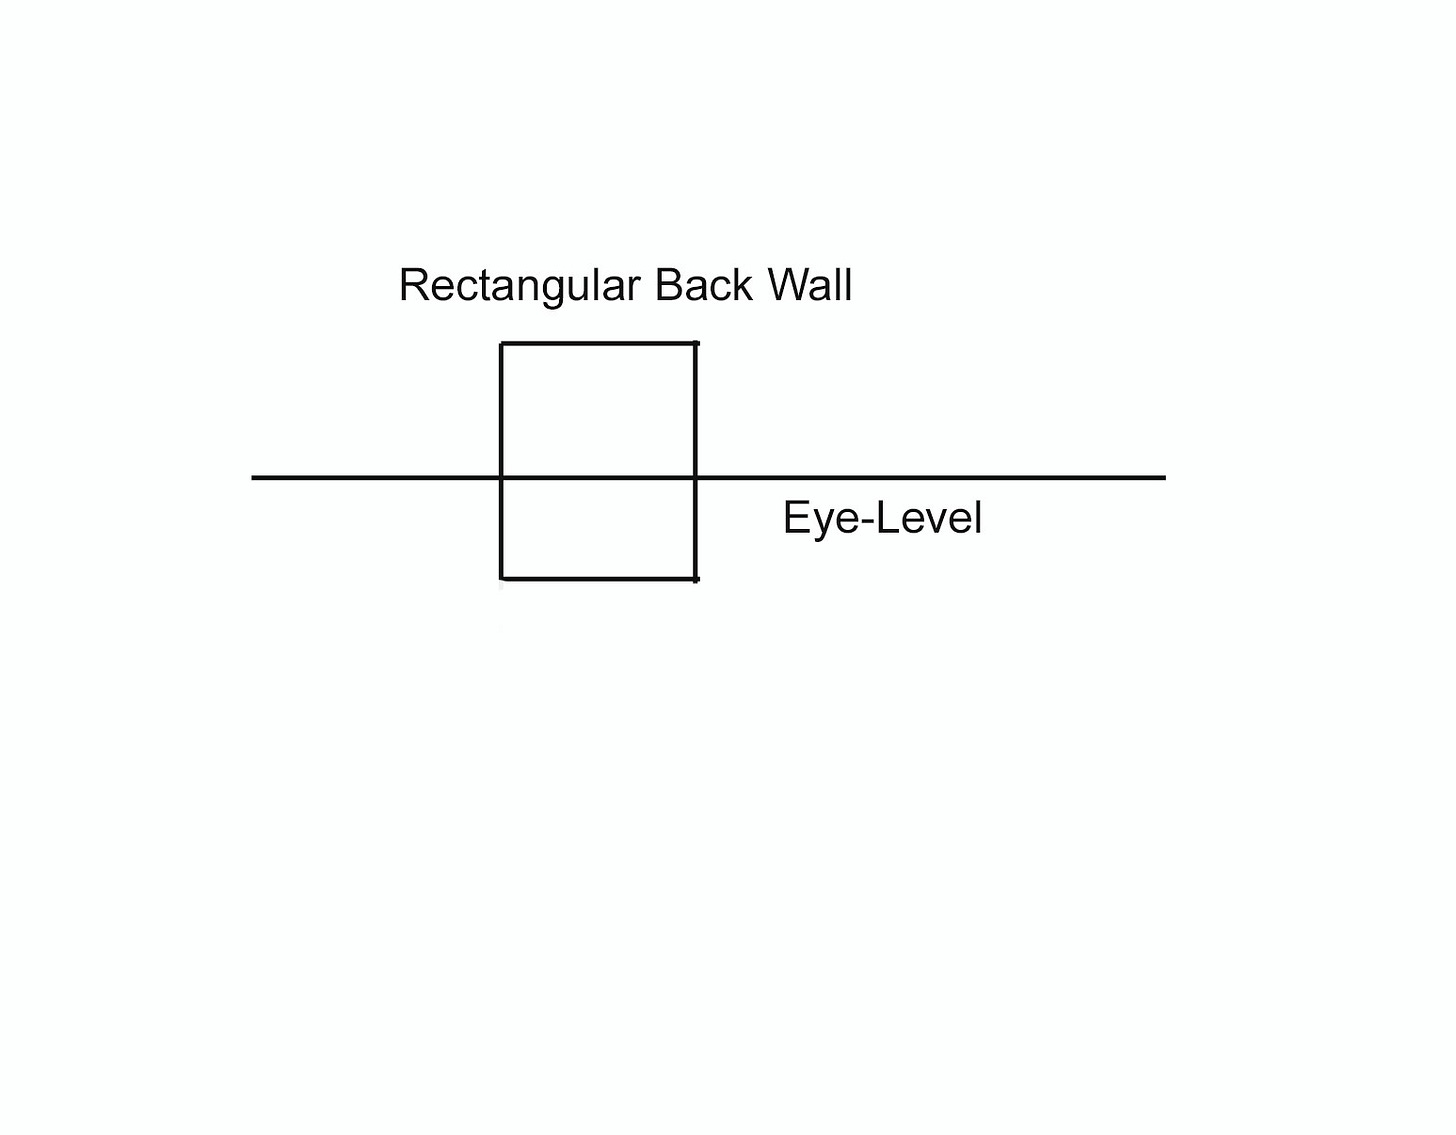
61 Newberry. Demo: Designating eye-level horizon line and a rectangle designating the wall you are facing.
2. Draw a rectangle representing the distant wall, in the best way as you see it.
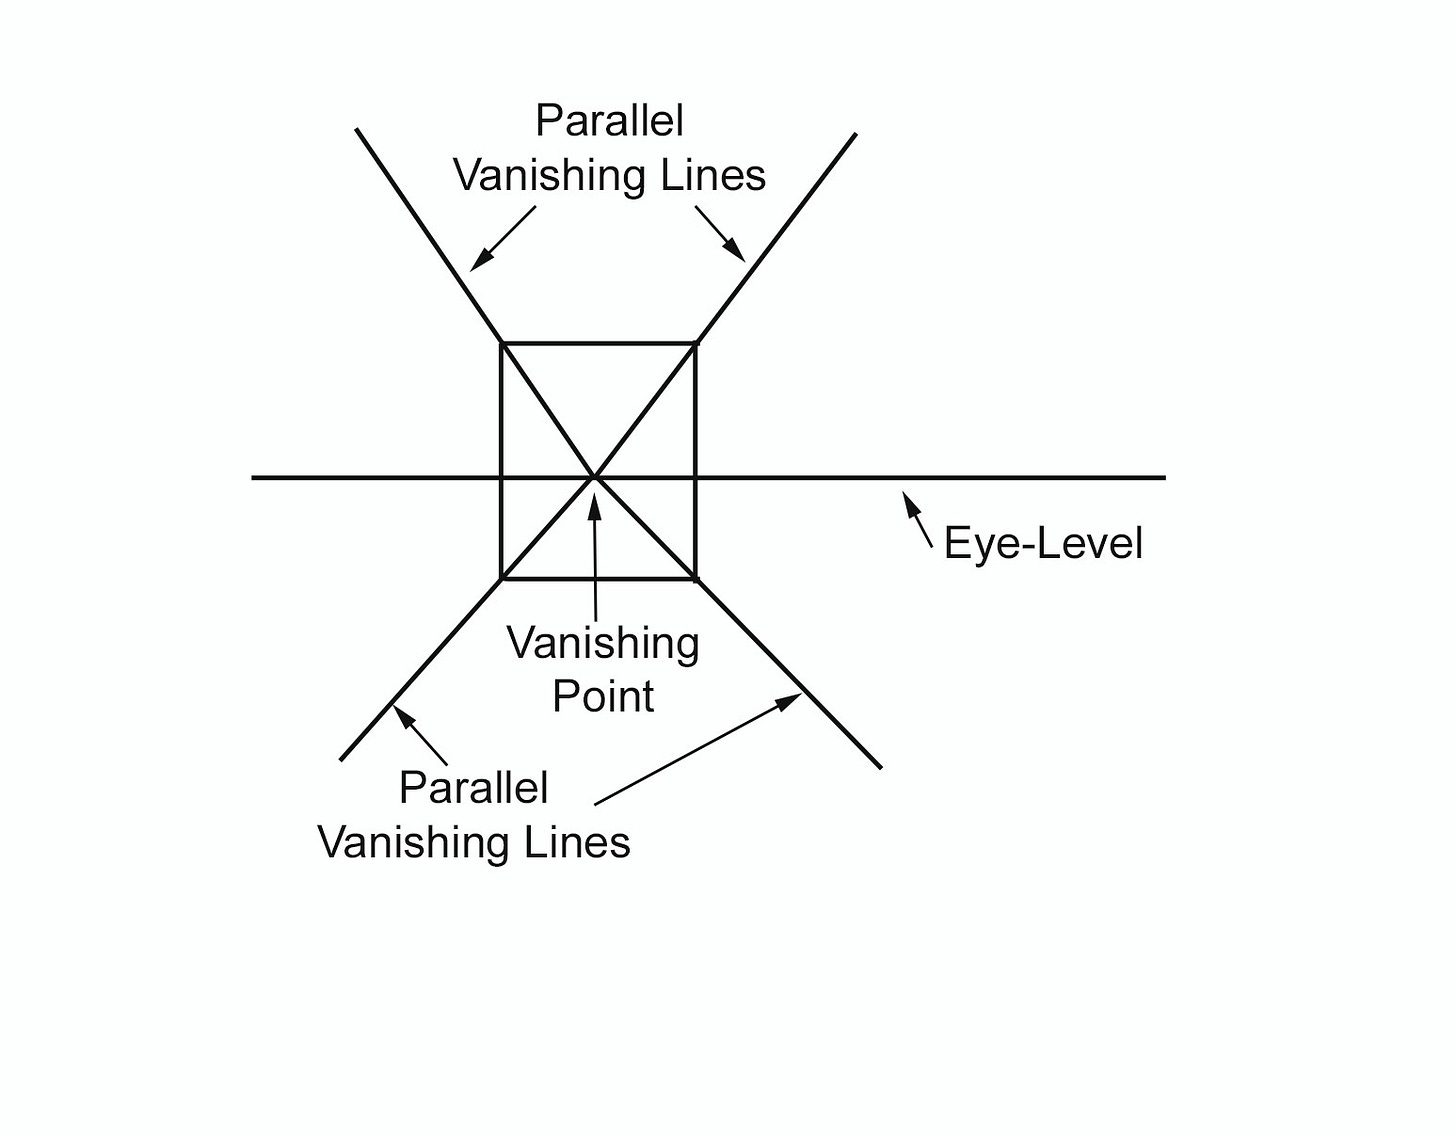
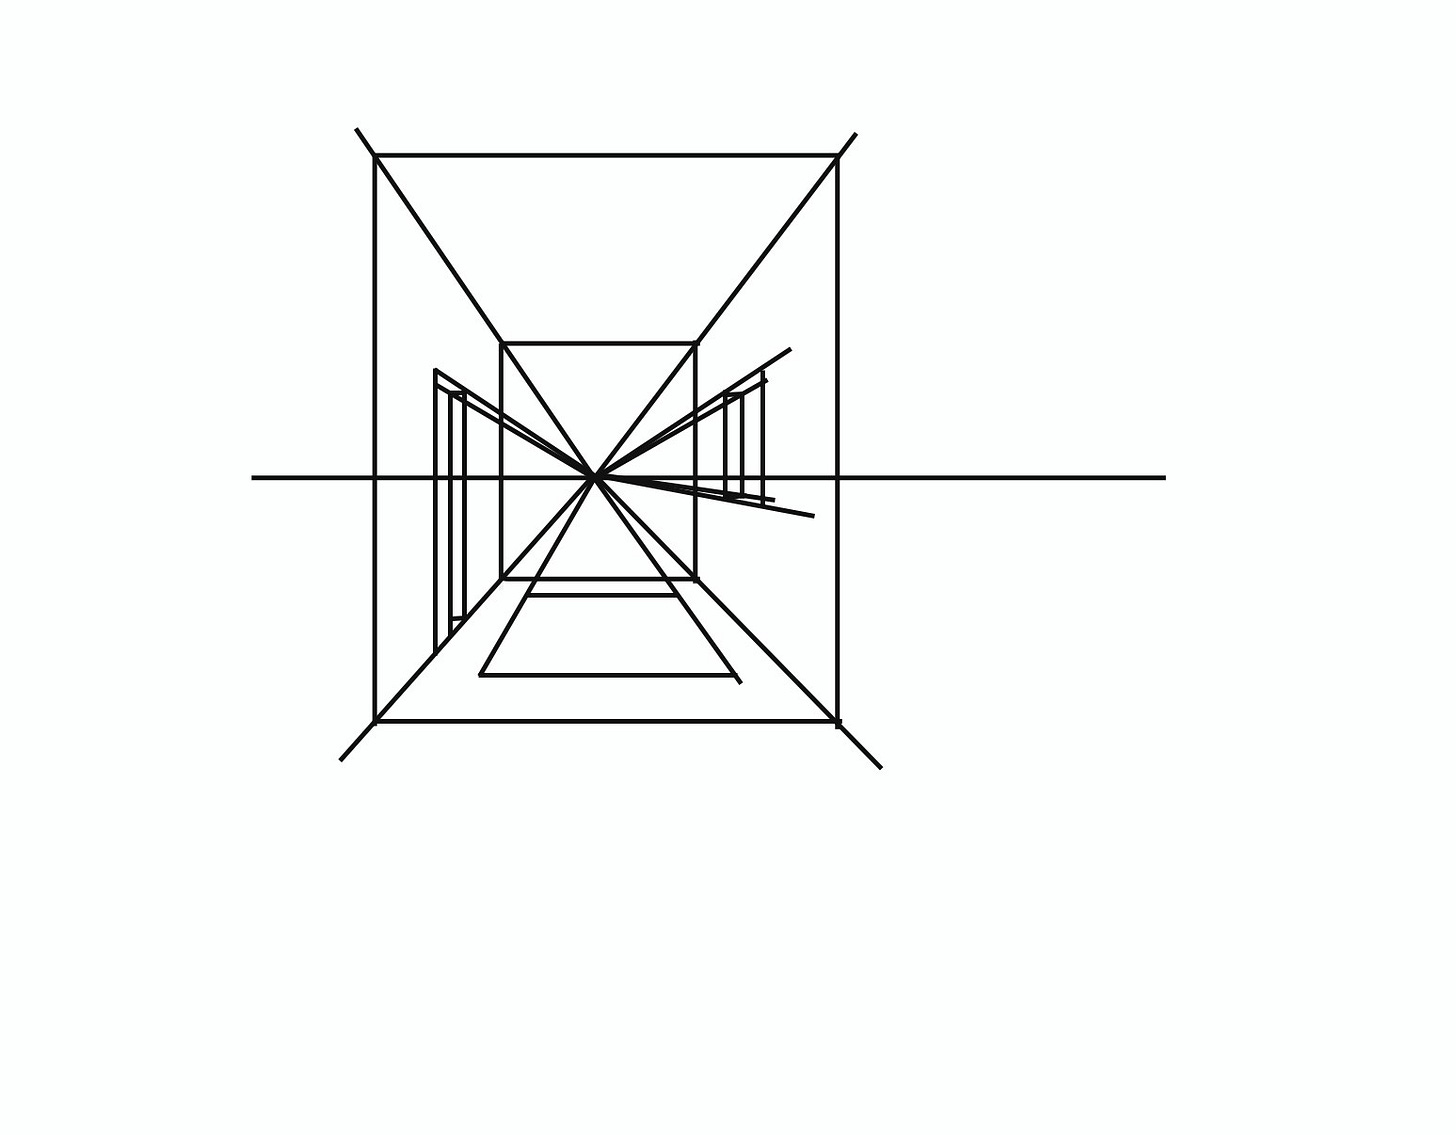
62 Newberry. Demo: Showing parallel vanishing lines being drawn from the vanishing point through the corners of the rectangle (back wall). These will be the edges of where the floor and ceiling meet the side walls.
3. Set the vanishing point on the eye level line.
4. Next you will be drawing the parallel vanishing lines/edges, where the ceiling meets the side walls and the floor meets those side walls, like an interior of a box. These parallel vanishing lines radiate out from the vanishing point and go precisely though each corner of the rectangle/back wall.
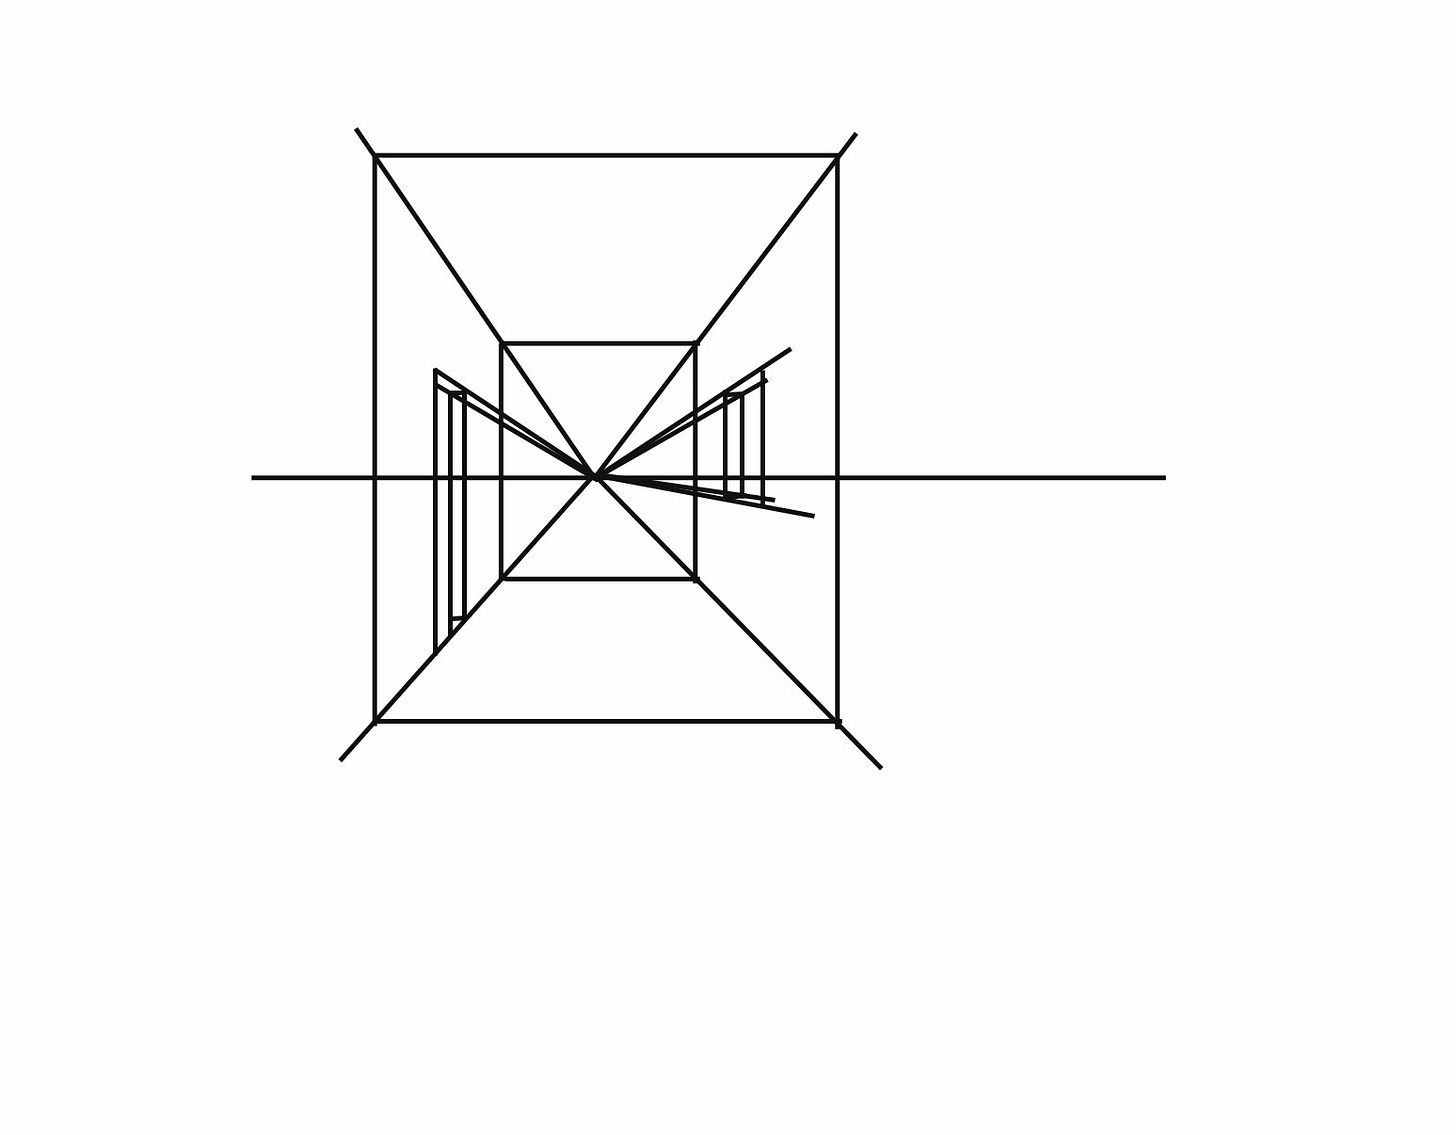
63 Newberry. Demo: Adding a larger rectangle that intersects with the vanishing lines, representing either the front edges of a box or the edges of the opening of an interior space.
5. Lastly, you complete the box-like interior by drawing two horizonal lines representing the floor and ceiling, and match them with two vertical lines representing the side walls. Presto! A box-like interior room.
64 Newberry. Demo: After erasing the guidelines, you should be left with view of a box-like interior.
65 Newberry. Demo: Using the same one-point perspective to set up the box-like interior you can experiment with adding a interior doorway and window.
6. Using the same one-point perspective technique you can go back and add a door and window and throw in a rug.
66 Newberry. Demo: You can even add a rectangular rug using the same one-point perspective.
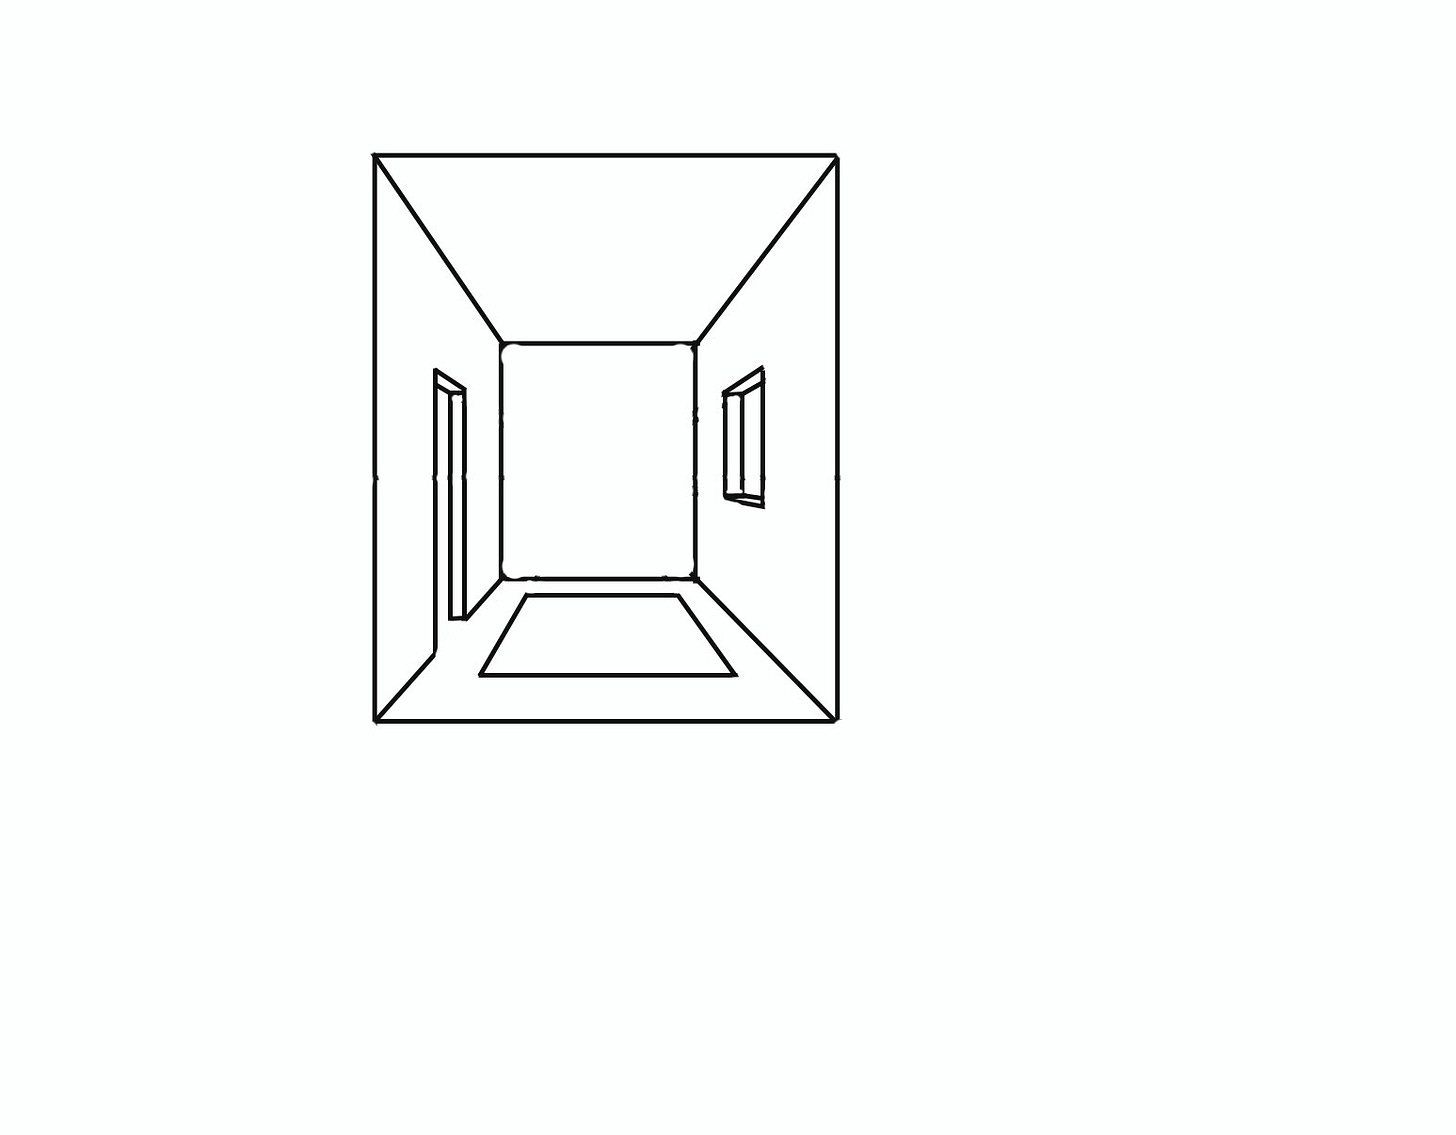
7. Finish the interior by erasing the guidelines and hopefully you have a simple and natural looking interior.
67 Newberry. Demo: After the guidelines are erased you a simple interior that feels natural.
What we covered so far: with these two practices we drew two cube-like exteriors and one box-like interior using one-point perspective. The technique gives a feeling of naturalness. Without this knowledge drawings of structures often look incompetent even to the untrained eye.
Practice #3
As always, it is crucial to reinforce your understanding through practice. The previous two practices were done in theory. Now I recommend drawing some exteriors and interiors free hand, just by sight. See if you can discern where the vanishing point is, and see if edges of where the side walls intersect the floor and ceiling/roof point towards the vanishing point. Make adjustments accordingly until the drawing both looks correct and close to what you see in real life. The perfect combination of theory and observation.
Reexamining the Last Supper
68 Id.
Now it should very rewarding to reexamine da Vinci’s The Last Supper. He must have had so much fun in elaborating using the one-point perspective. He used Jesus's head as the center of the vanishing point, specifically Jesus’s right eye, giving him prominence—all the parallel vanishing lines radiate out and converge towards his eye. Also notice how many of the apostles’ eyes are directly on the painting’s eye-level. What a masterpiece!
One-point perspective is a powerful and essential technique for creating the illusion of depth and distance in art. By understanding the concept of the vanishing point and the importance of an artist's eye-level, you can use this technique to draw believable interiors, urban landscapes, and still lifes. Mastering one-point perspective will greatly enhance your drawings and paintings, and it will make drawing urban settings much easier, more dramatic, and more rewarding.


