


Chapter 18, True Lies: Warp Negative Space
From my upcoming new edition of The Art Studio Companion


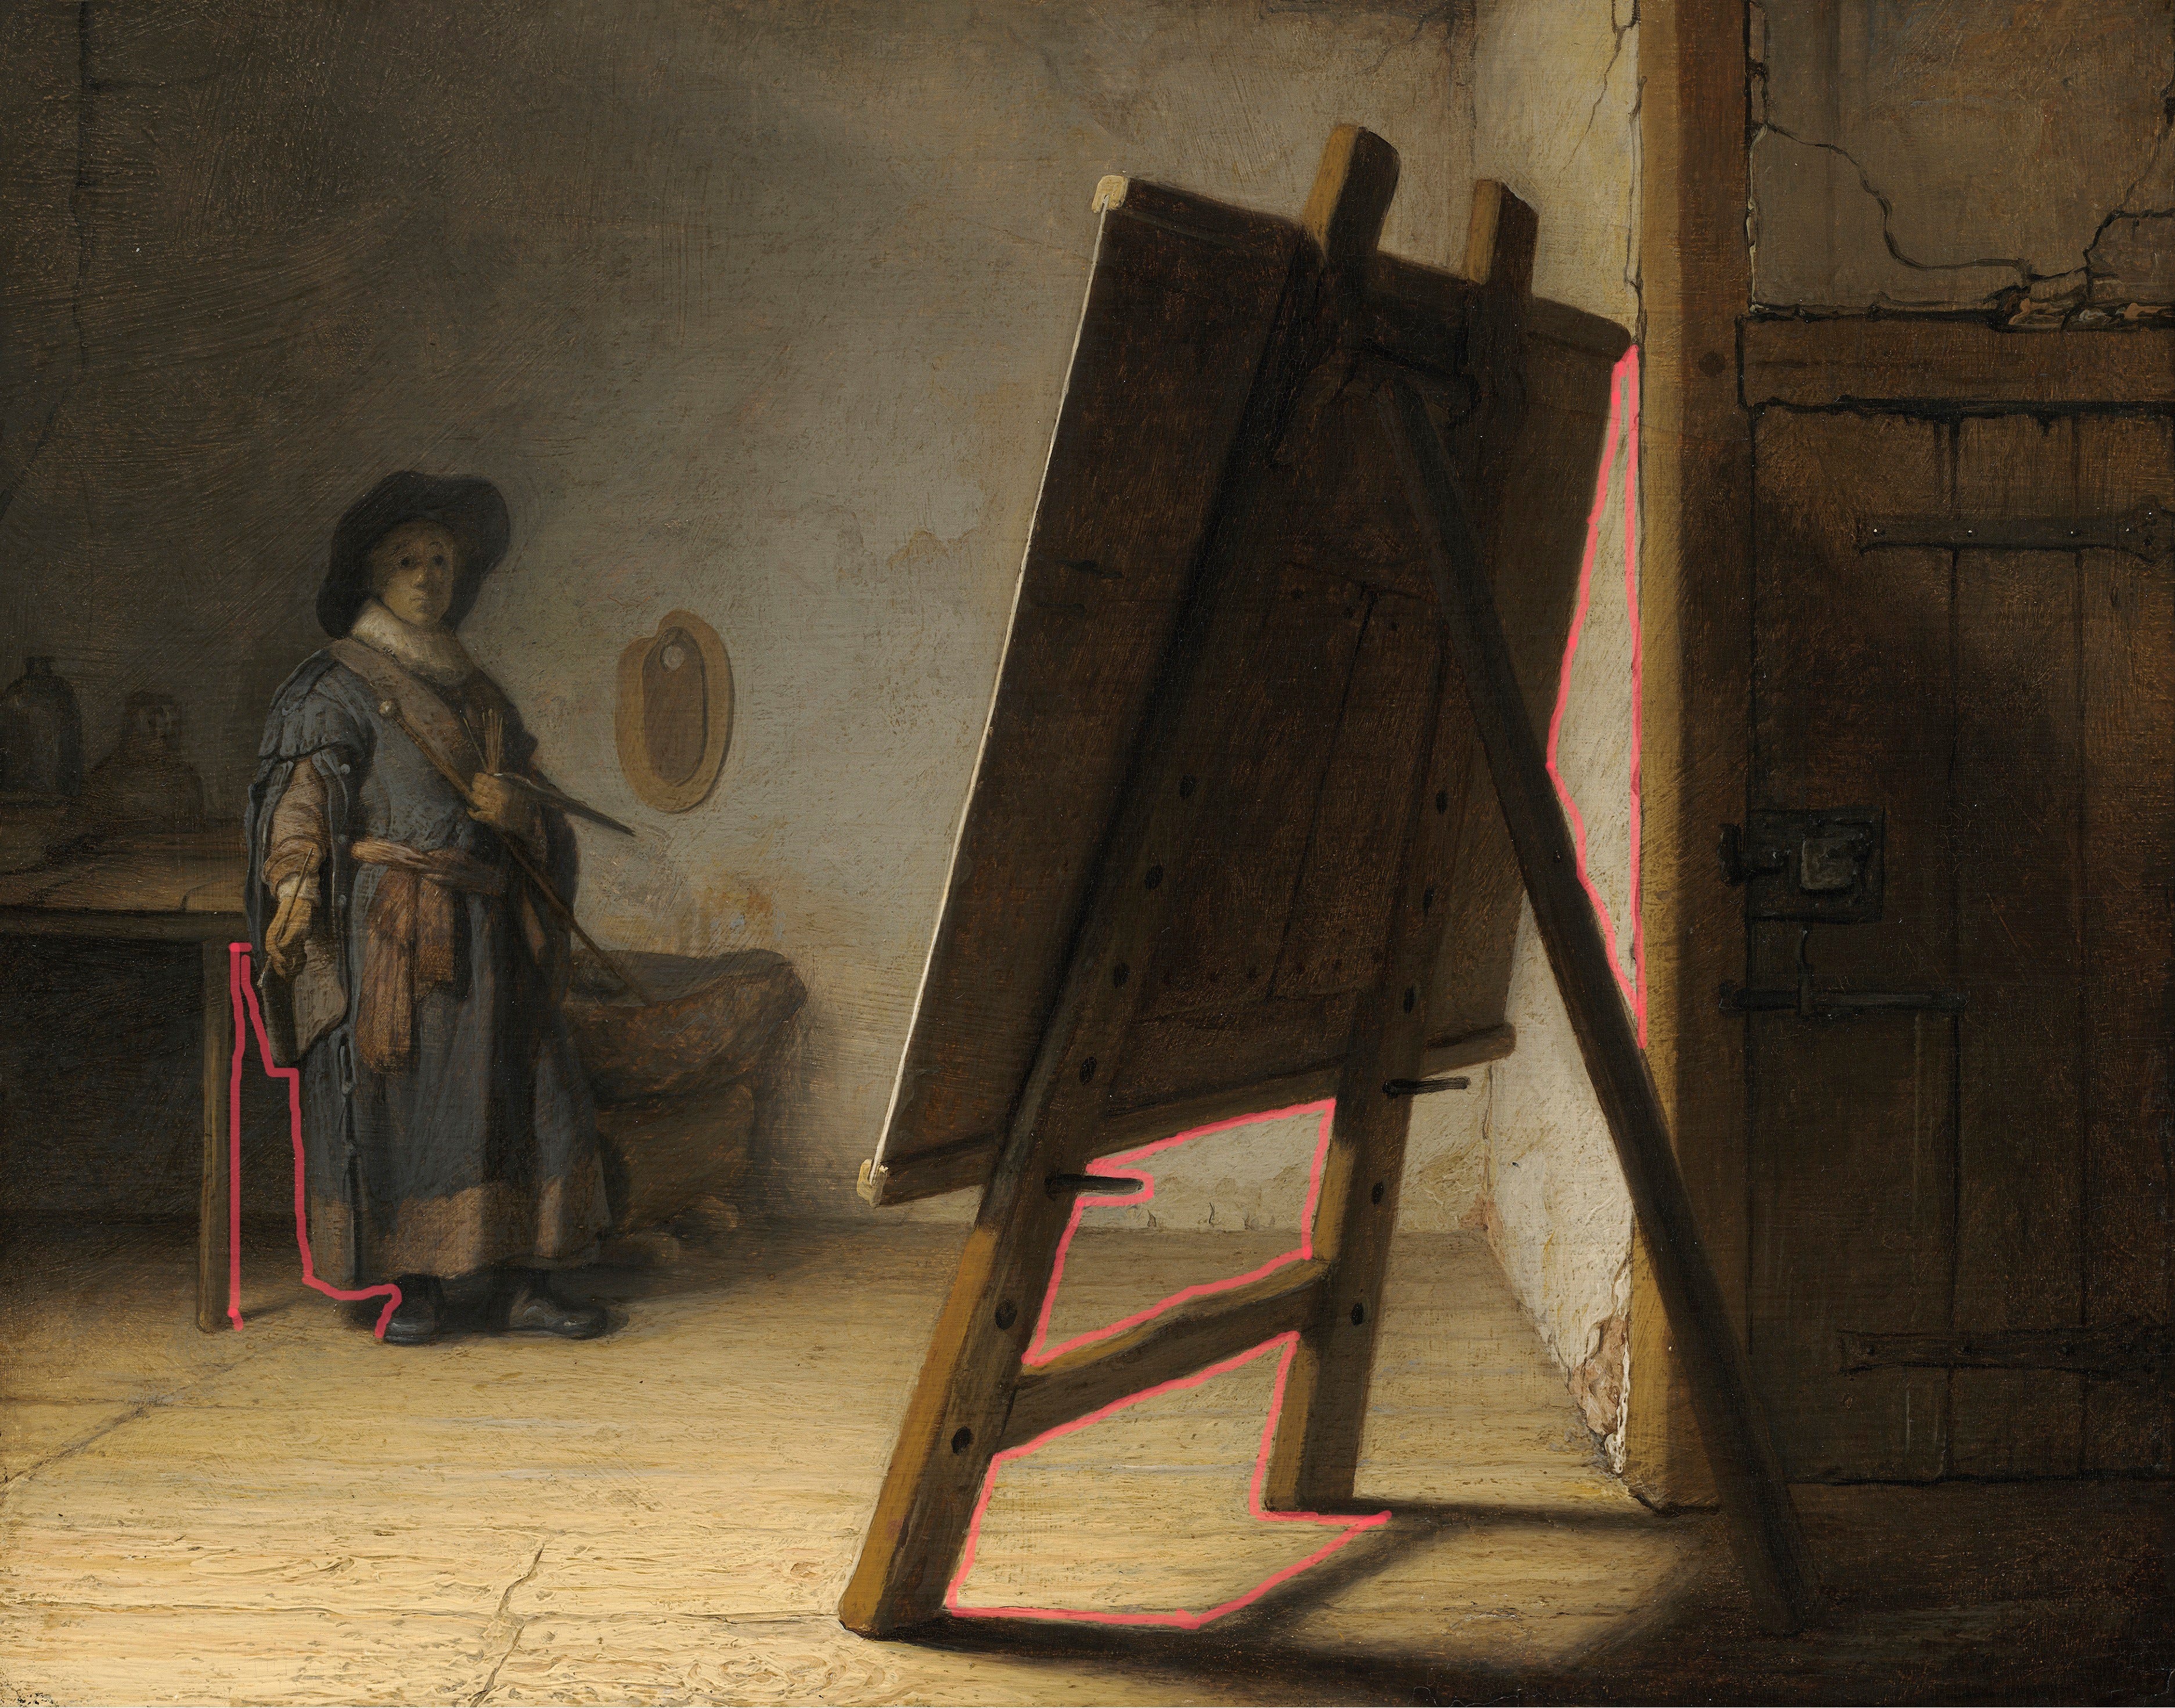
133 Rembrandt, The Artist in His Studio, 1626. WC.
In this study, we analyze negative space and how the artist needs to warp it to make the painting feel real and believable. We explore Rembrandt's remarkable talent for warping negative space, a lesser-known aspect of his genius, which allows him to place objects in believable spatial depth and infuse his works with a profound sense of light and depth.
In painting, a composition is often divided between solid objects (positive) and negative spaces. But for this tutorial, we will concentrate on the negative space. In reality, negative space is the space between objects—a space you could pass your hand through, for instance. Imagine seeing the space between the Earth and the Moon, or the space between trees, or the space in a doorway that you can walk through. In real life, we think of it as emptiness. But in painting, there has to be a lot of manipulation of the negative space to make it feel real, giving truth to Picasso's famous statement: “Art is a lie that makes us realize the truth.”
“Art is a lie that makes us realize the truth.”
Picasso
Many artists mistakenly focus only on positive forms, but don’t give equal effort on the space between the forms. But to master creating depth, form, and light it is imperative to be able to paint fantastic empty space!
In Rembrandt’s The Artist in His Studio, we are going to look at the negative space between the easel’s front legs.
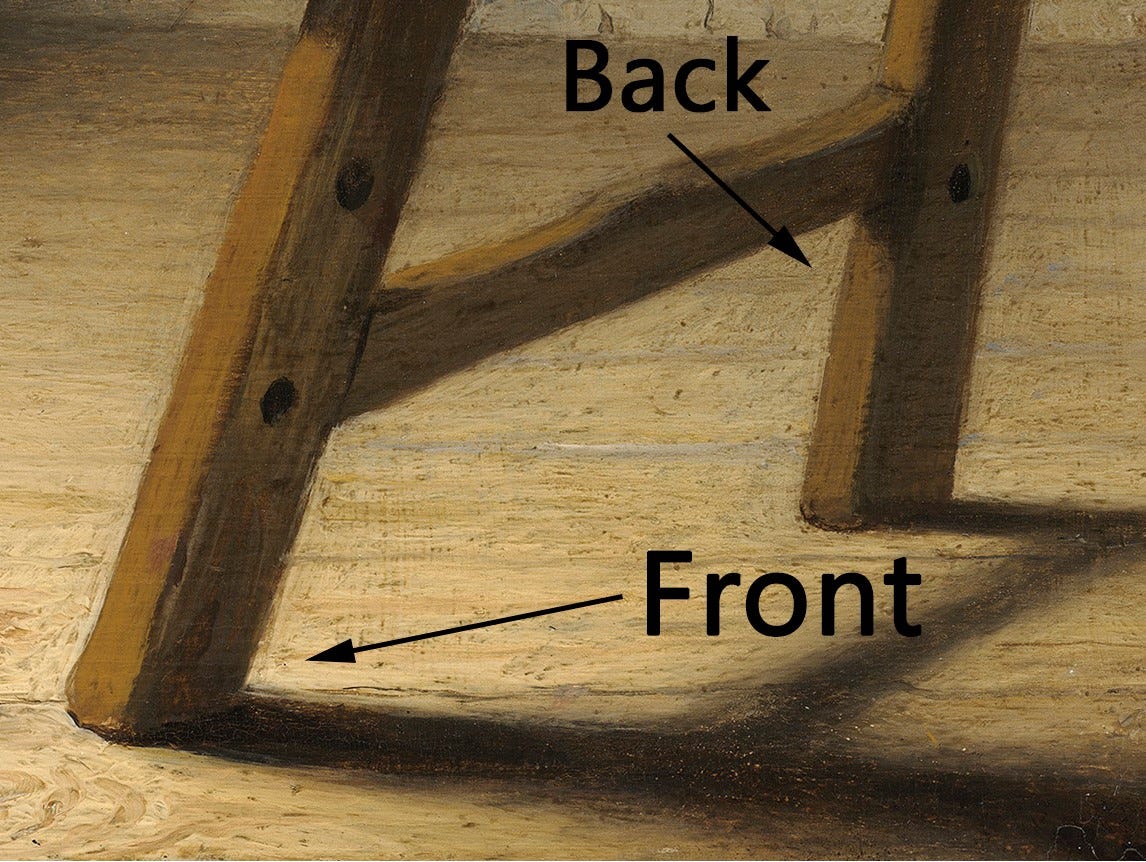
134 Rembrandt. With my markup.
Rembrandt warps the negative space by a subtle tone shift. The floor space between the legs is more diffused, softer as it goes back, and it gets brighter in tone and more saturated in color as it comes closer.
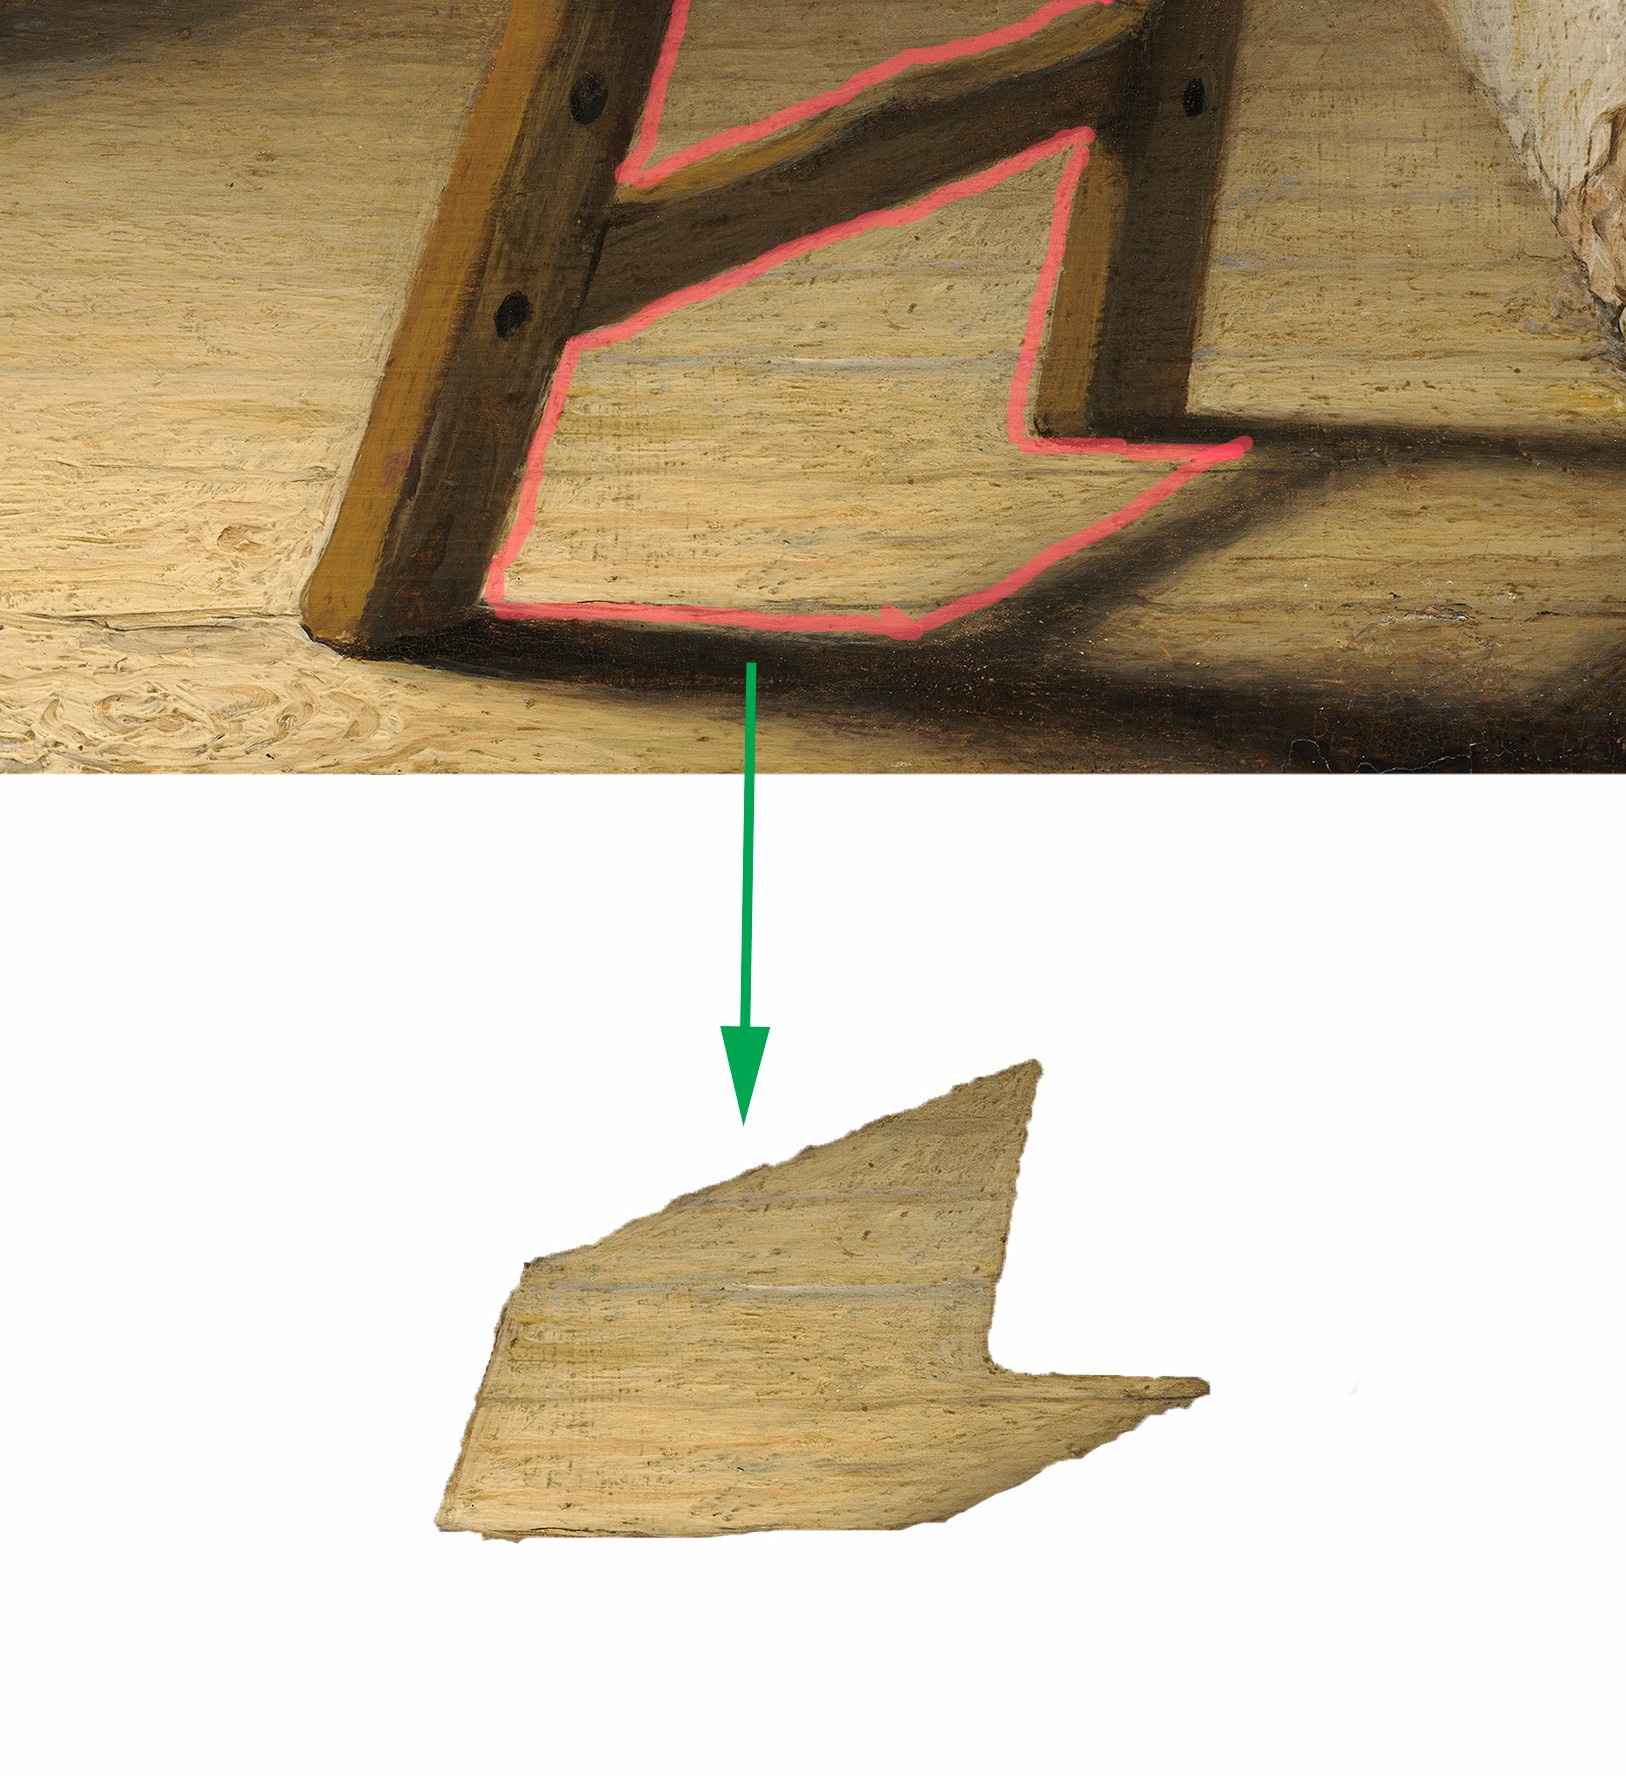
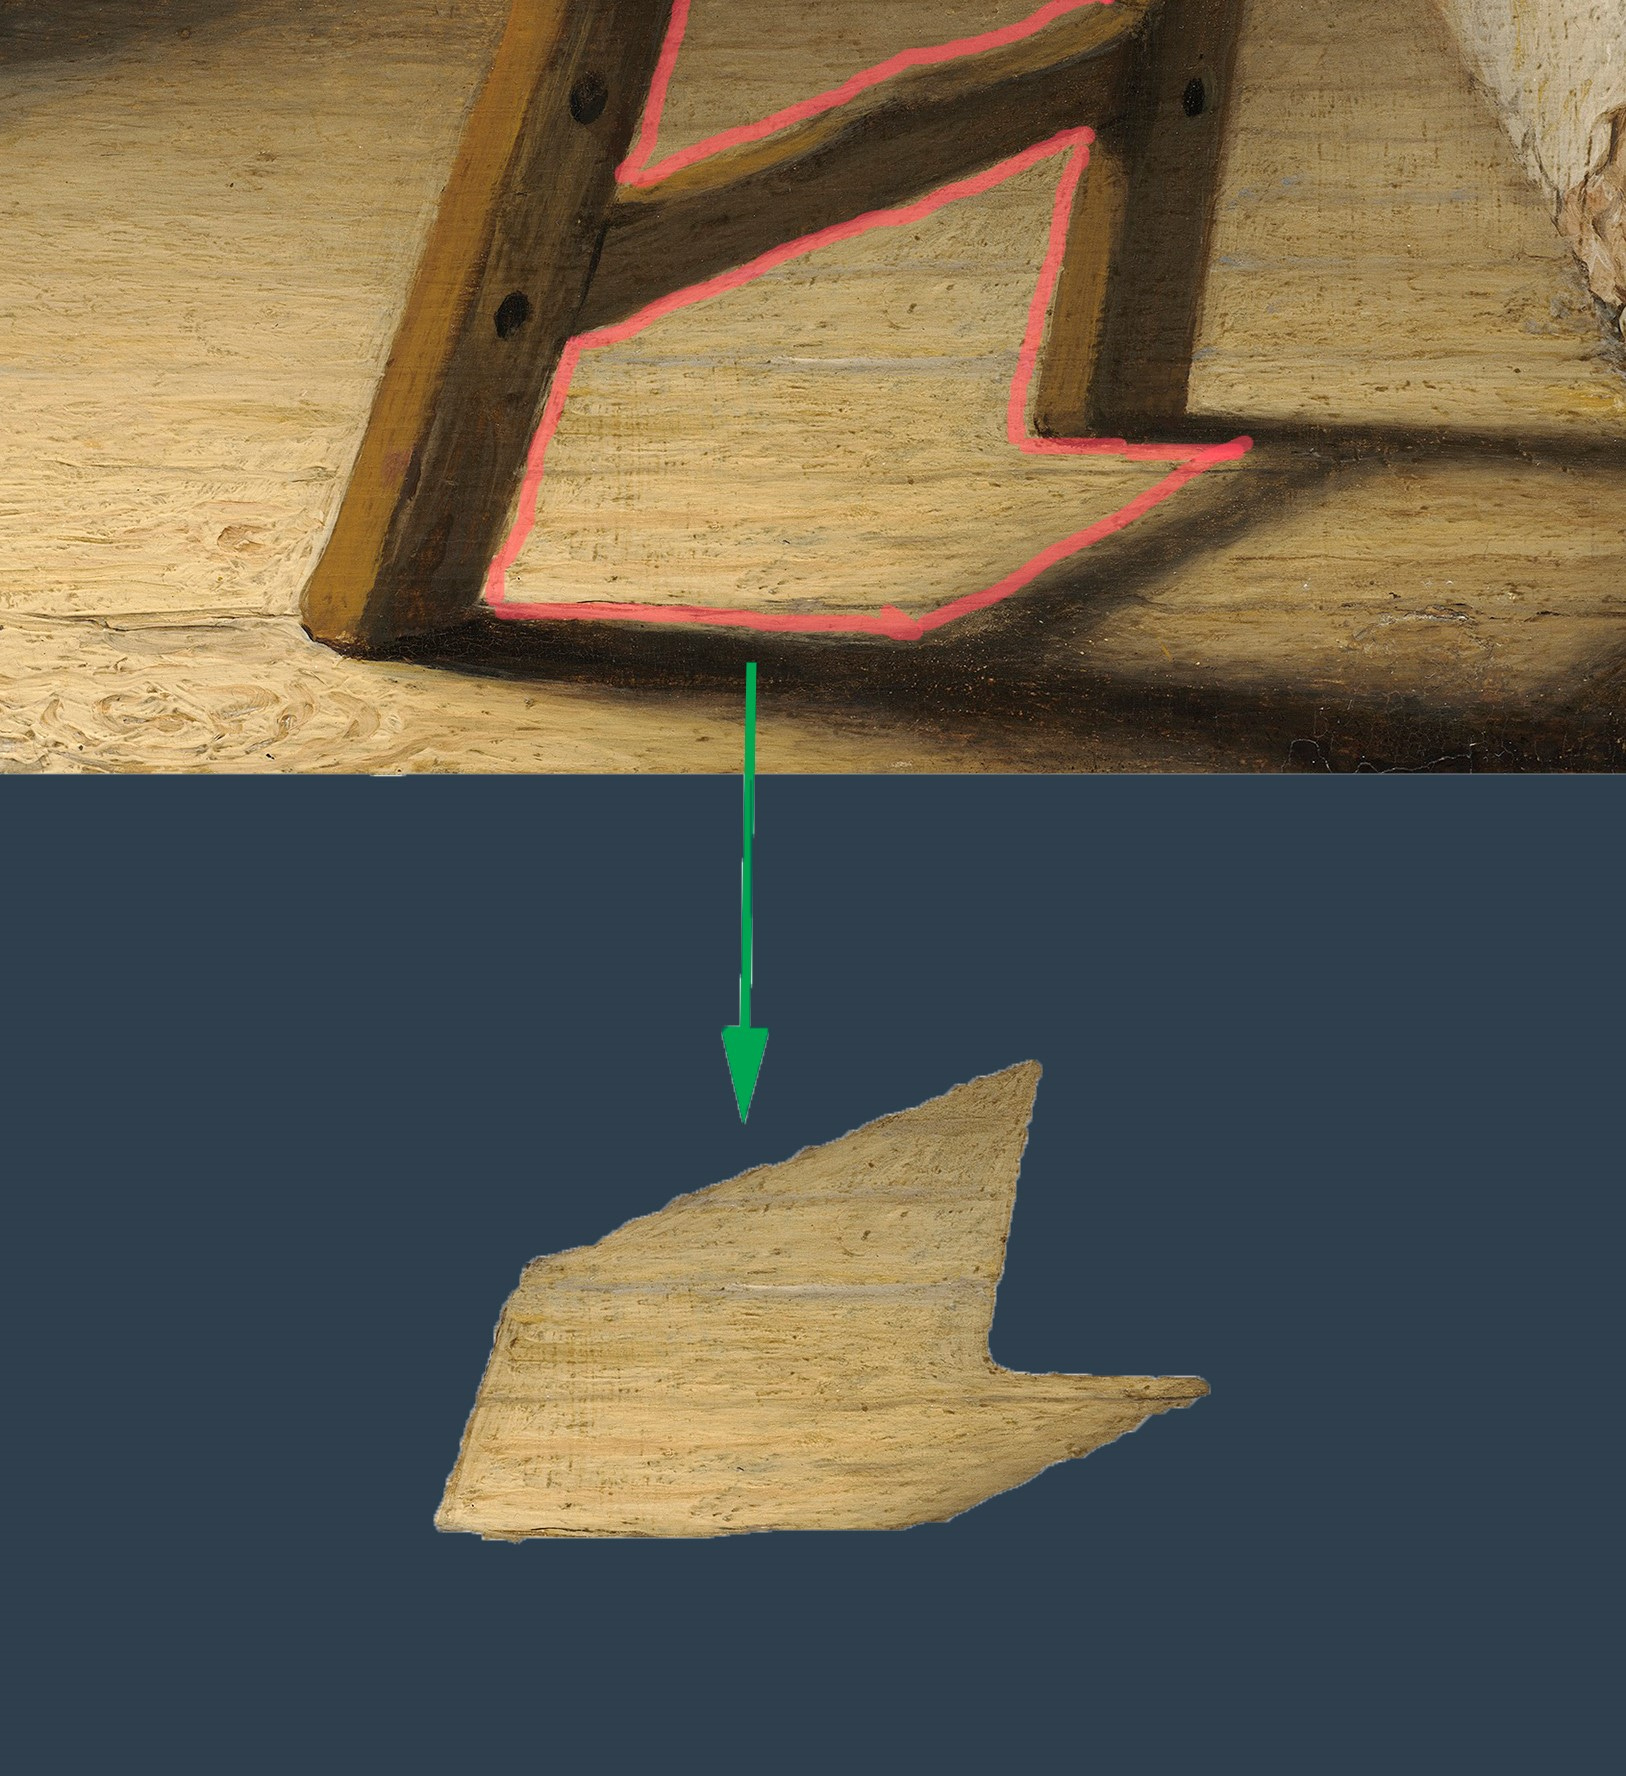
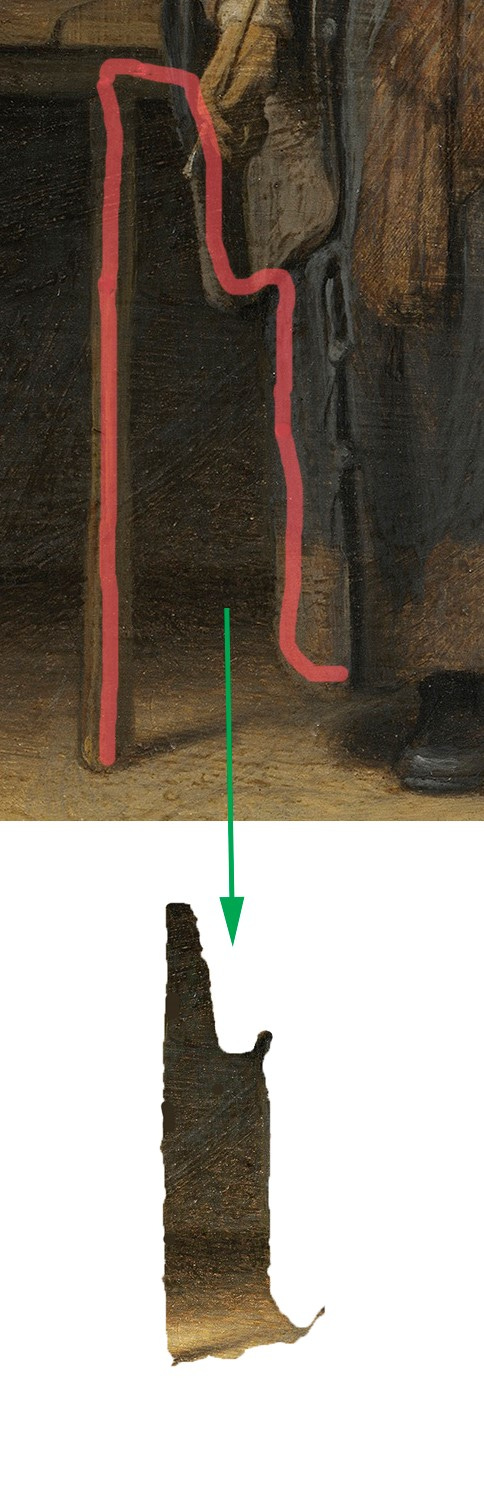
135 Rembrandt. With my markup and cutout.
Notice what happens when we cut out the negative between the easel’s legs. It almost looks like a 3d image of an open book’s interior pages. It has a solid and warped shape, nothing like what we think of as empty space. [Not to confuse you, I know it’s the floor, but it is background negative space between the easel’s legs.]

136 Vermeer, Girl with a Red Hat, 1669. WC.
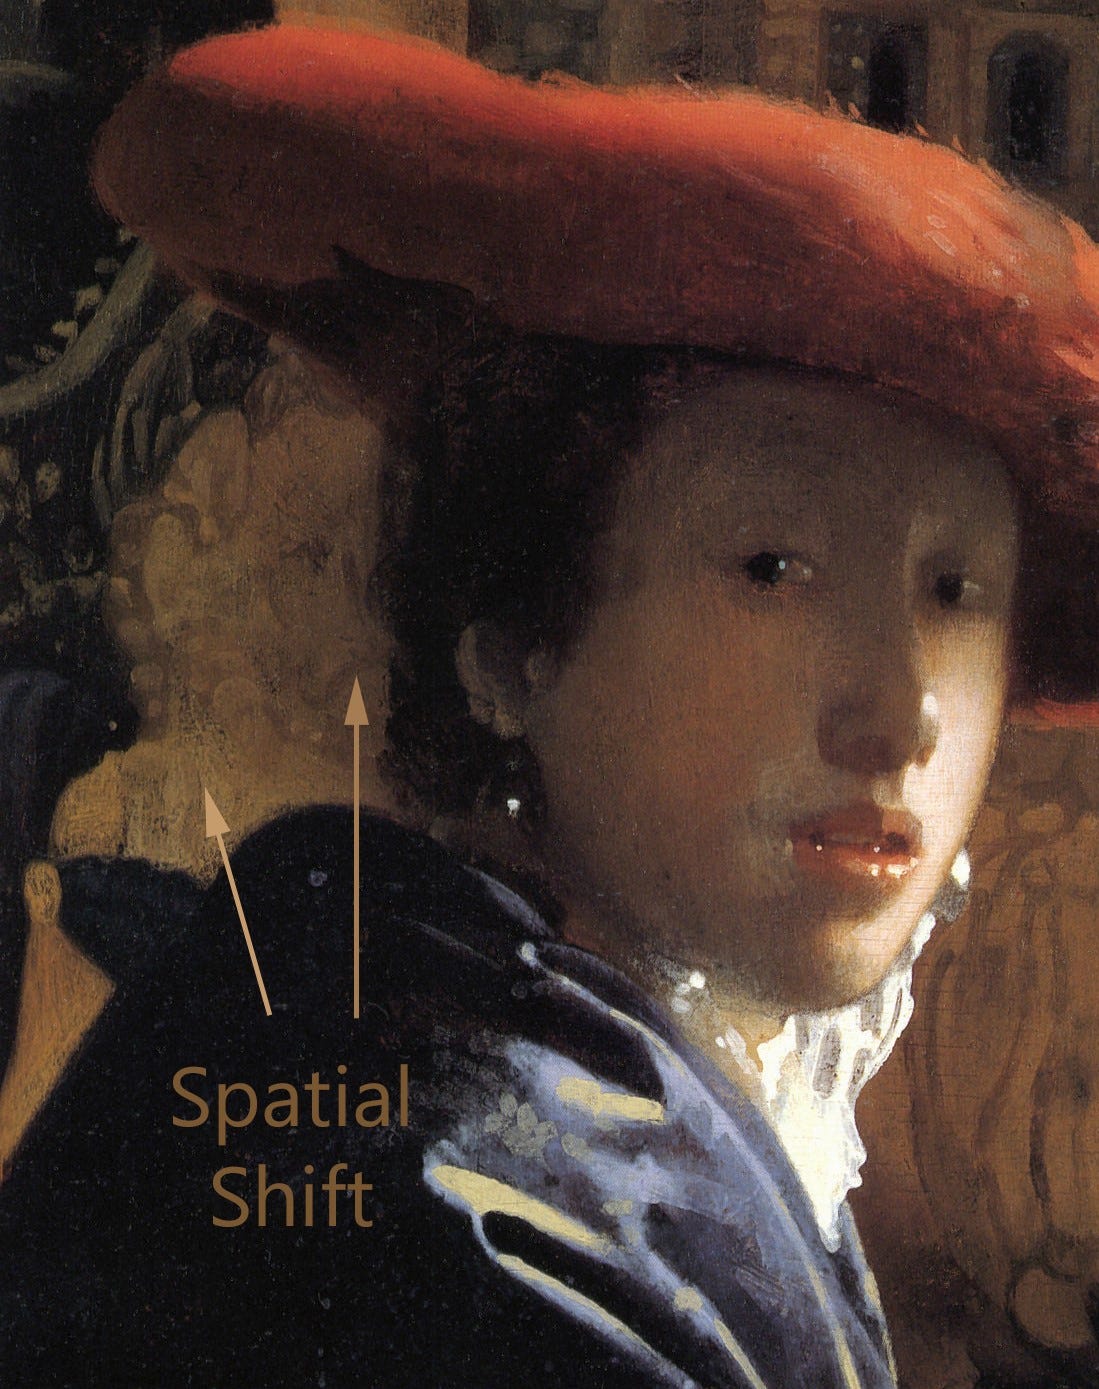
137 Vermeer. With my markup.
In Vermeer’s Girl with a Red Hat, notice how the background negative space recedes towards back of her head, and comes closer to her wrap, which is closer to us than the back of her head. Notice how carefully the space changes: the gold tones get cooler and darker as they rotate back behind her head, and they get warmer and lighter as they come forward.[1]
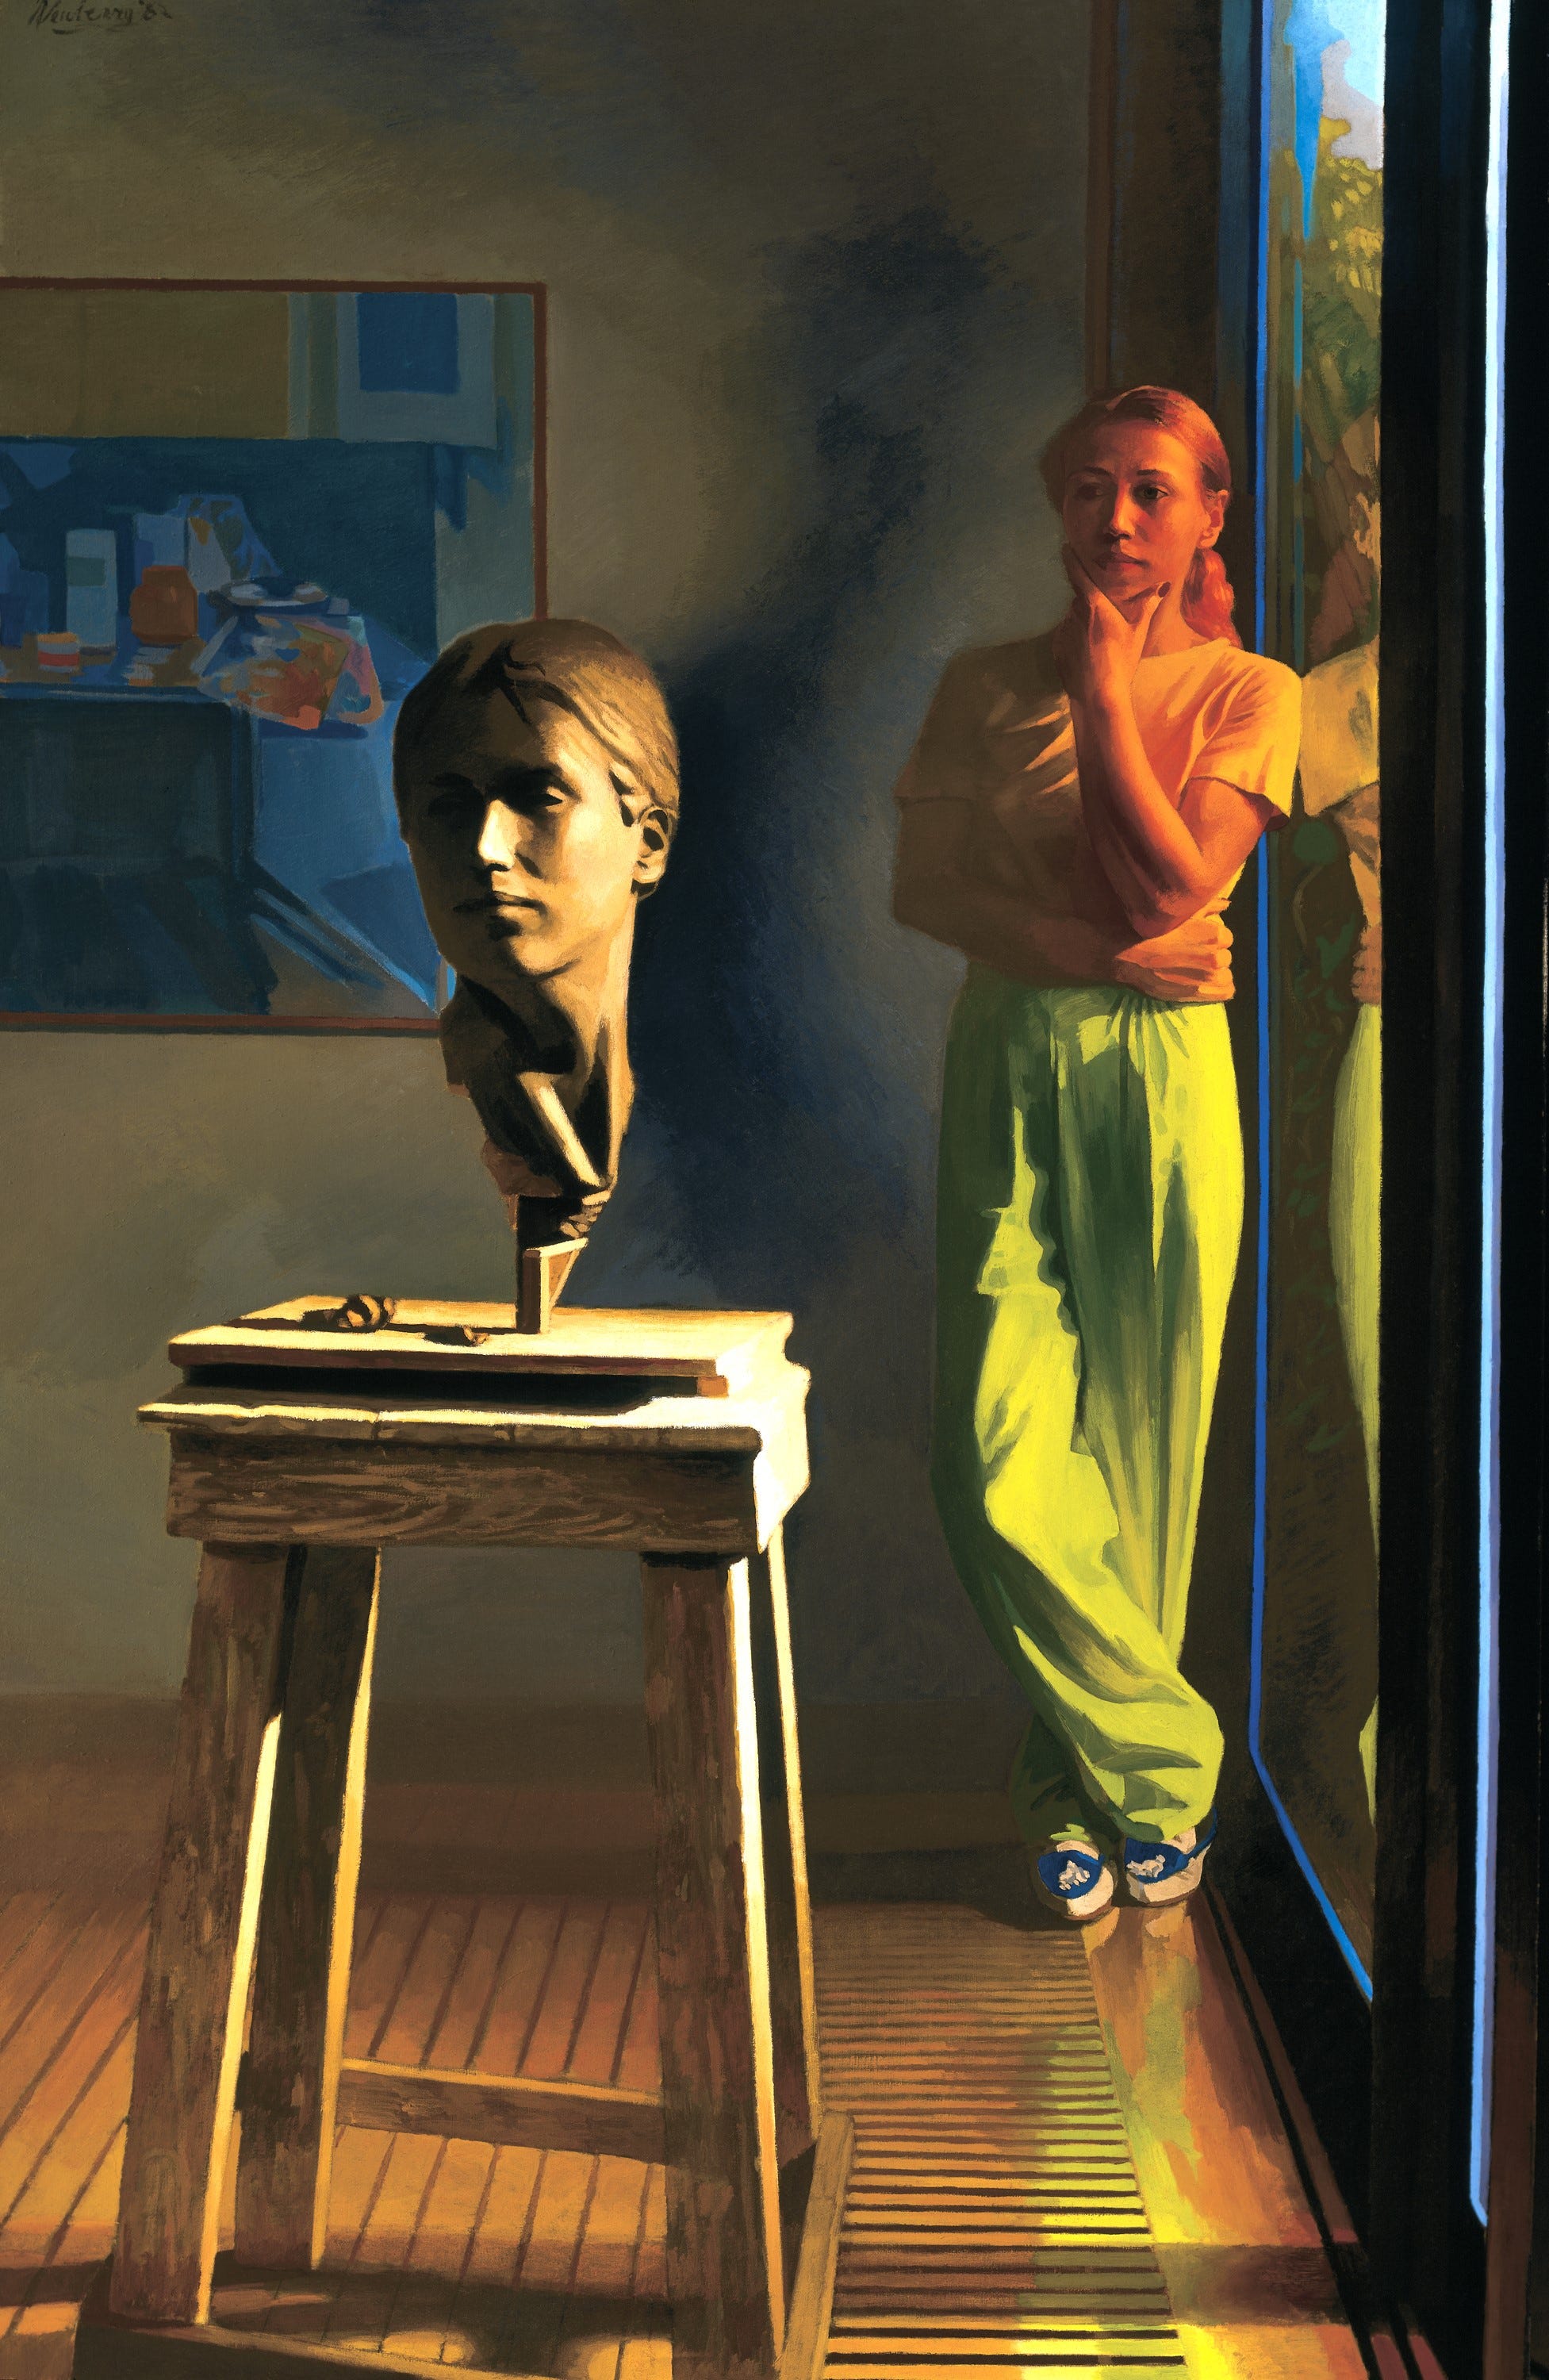
138 Newberry, The Sculptor, 1982, oil on linen.
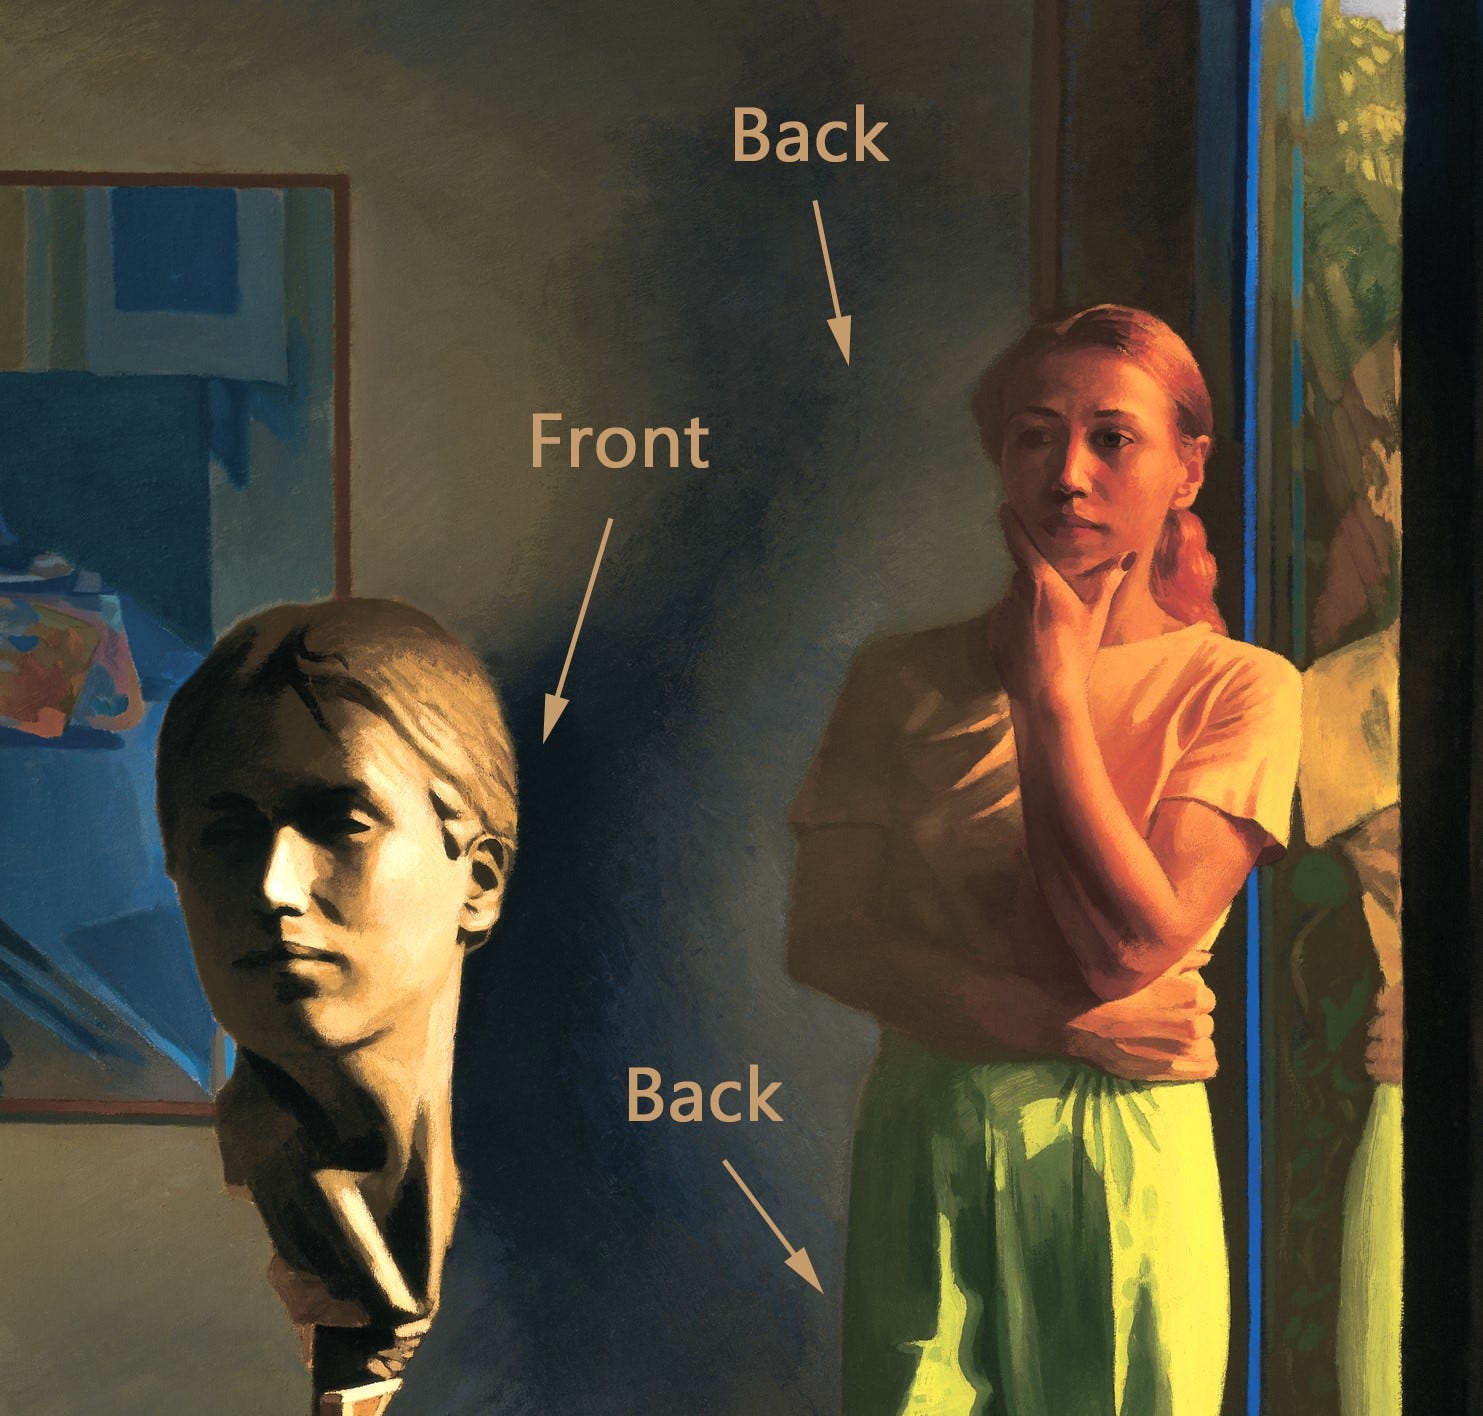
139 Newberry. With my markup.
In my painting, The Sculptor, the background space between the woman and her self-portrait bust gives a good idea of the extent to which the space has been warped.[2] I created a dark atmospheric shadow that twists through space, getting dimmer as it recedes into the background and darker as it comes closer and edges the bust in the foreground.
Mastering the concept of negative space and how to warp it is no easy task, but it will dramatically improve depth, light, and life in your artworks.
Practice #1
As always, it is crucial to reinforce your understanding through practice. Take a masterpiece from Rembrandt, Vermeer, or from the Renaissance, and simply outline the negative spaces to practice zeroing on them. Like I have done in the image below. Find as many of them as possible, you will find that you will start noticing the negative spaces in real life and in paintings. It is super training for your eye.
140 Rembrandt. With my markups of some of the negative spaces.
Practice #2
As always, it is crucial to reinforce your understanding through practice. Using a Rembrandt or Vermeer masterpiece, focus on a lit negative space do a pastel drawing on dark paper of only the negative space. In Demo #141 I used photoshop to cut out the negative space so you could see it isolated. You don’t need to do this, simply draw the negative space from the painting directly. This will strengthen your understanding of warping and shaping the negative space without getting distracted by solid forms.
141 Rembrandt. With my markup and cutout.
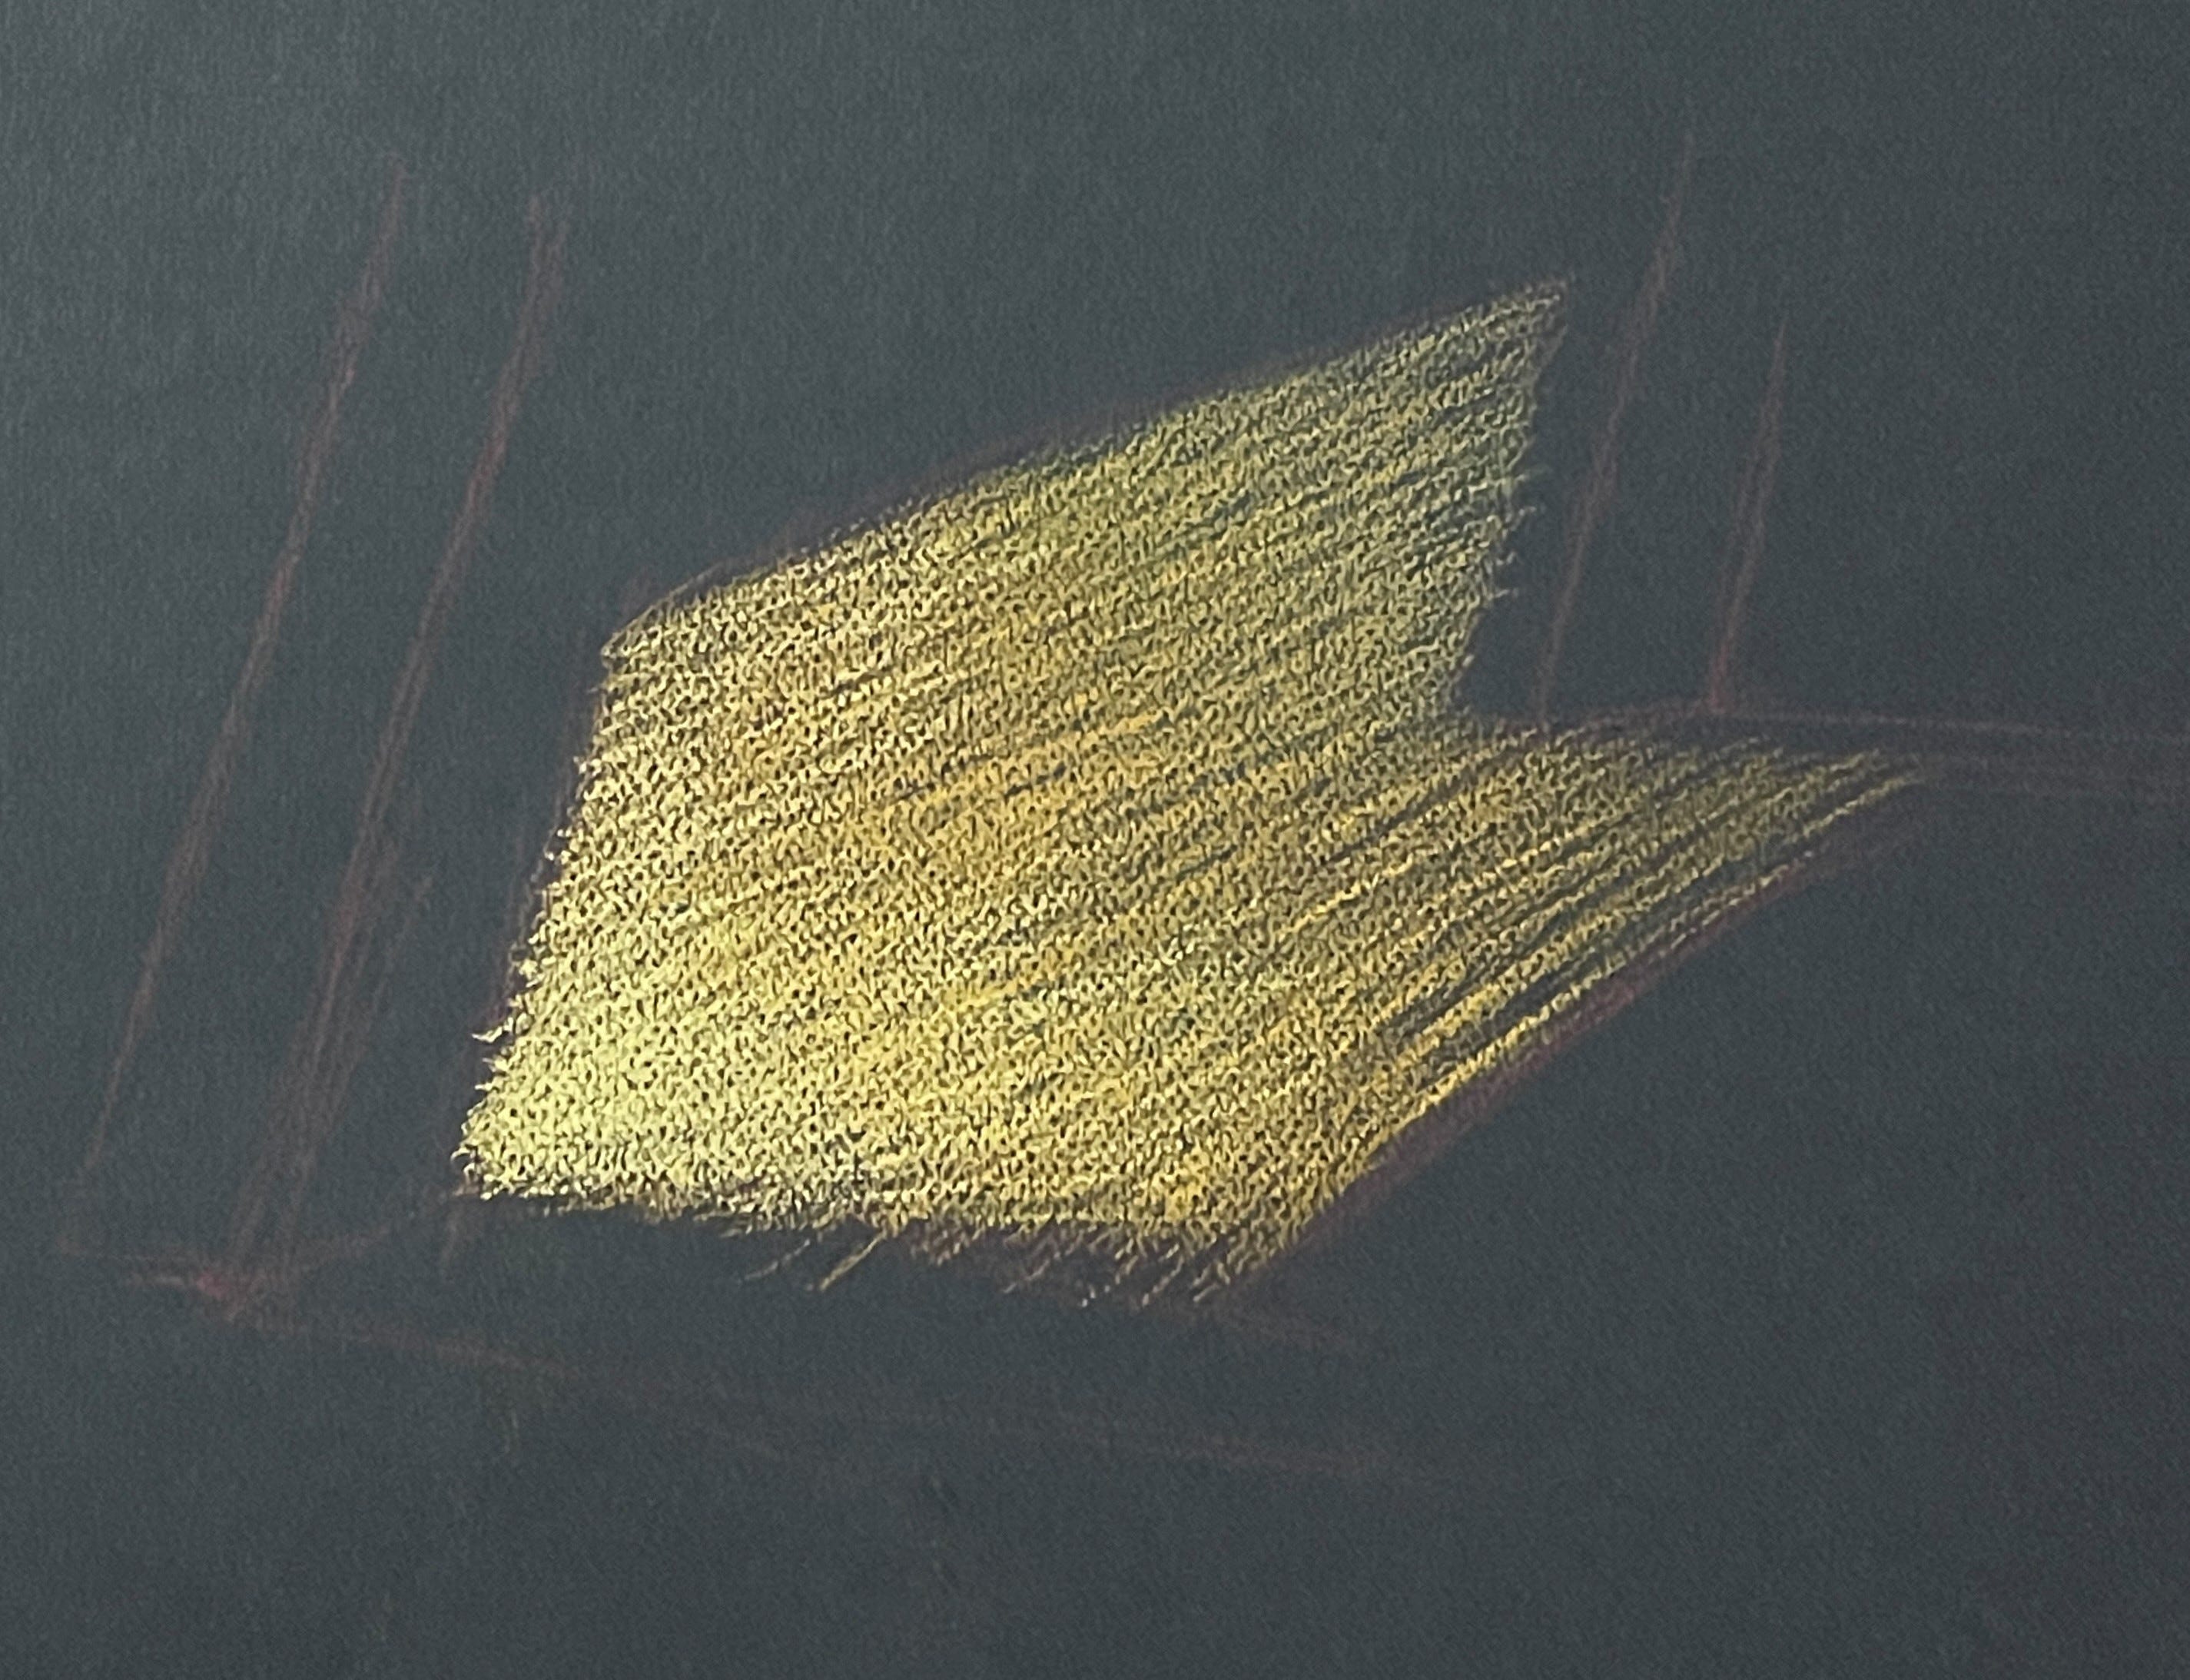
142 Newberry. Pastel study of Rembrandt’s negative space.
Here is my pastel study on dark paper of the negative space between the easel’s legs from the Rembrandt painting. To isolate the negative space in practice is a great way to wrap your brain around such an abstract, yet very important artist tool.
Practice #3
Like with Practice #2, isolate a negative space, but this time a dark area. And using pen and paper, draw it directly from the painting, with a special focus on how dark negative space meets the edges, like with the table leg and Rembrandt’s coat.
143 Rembrandt. With my markup and cutout.
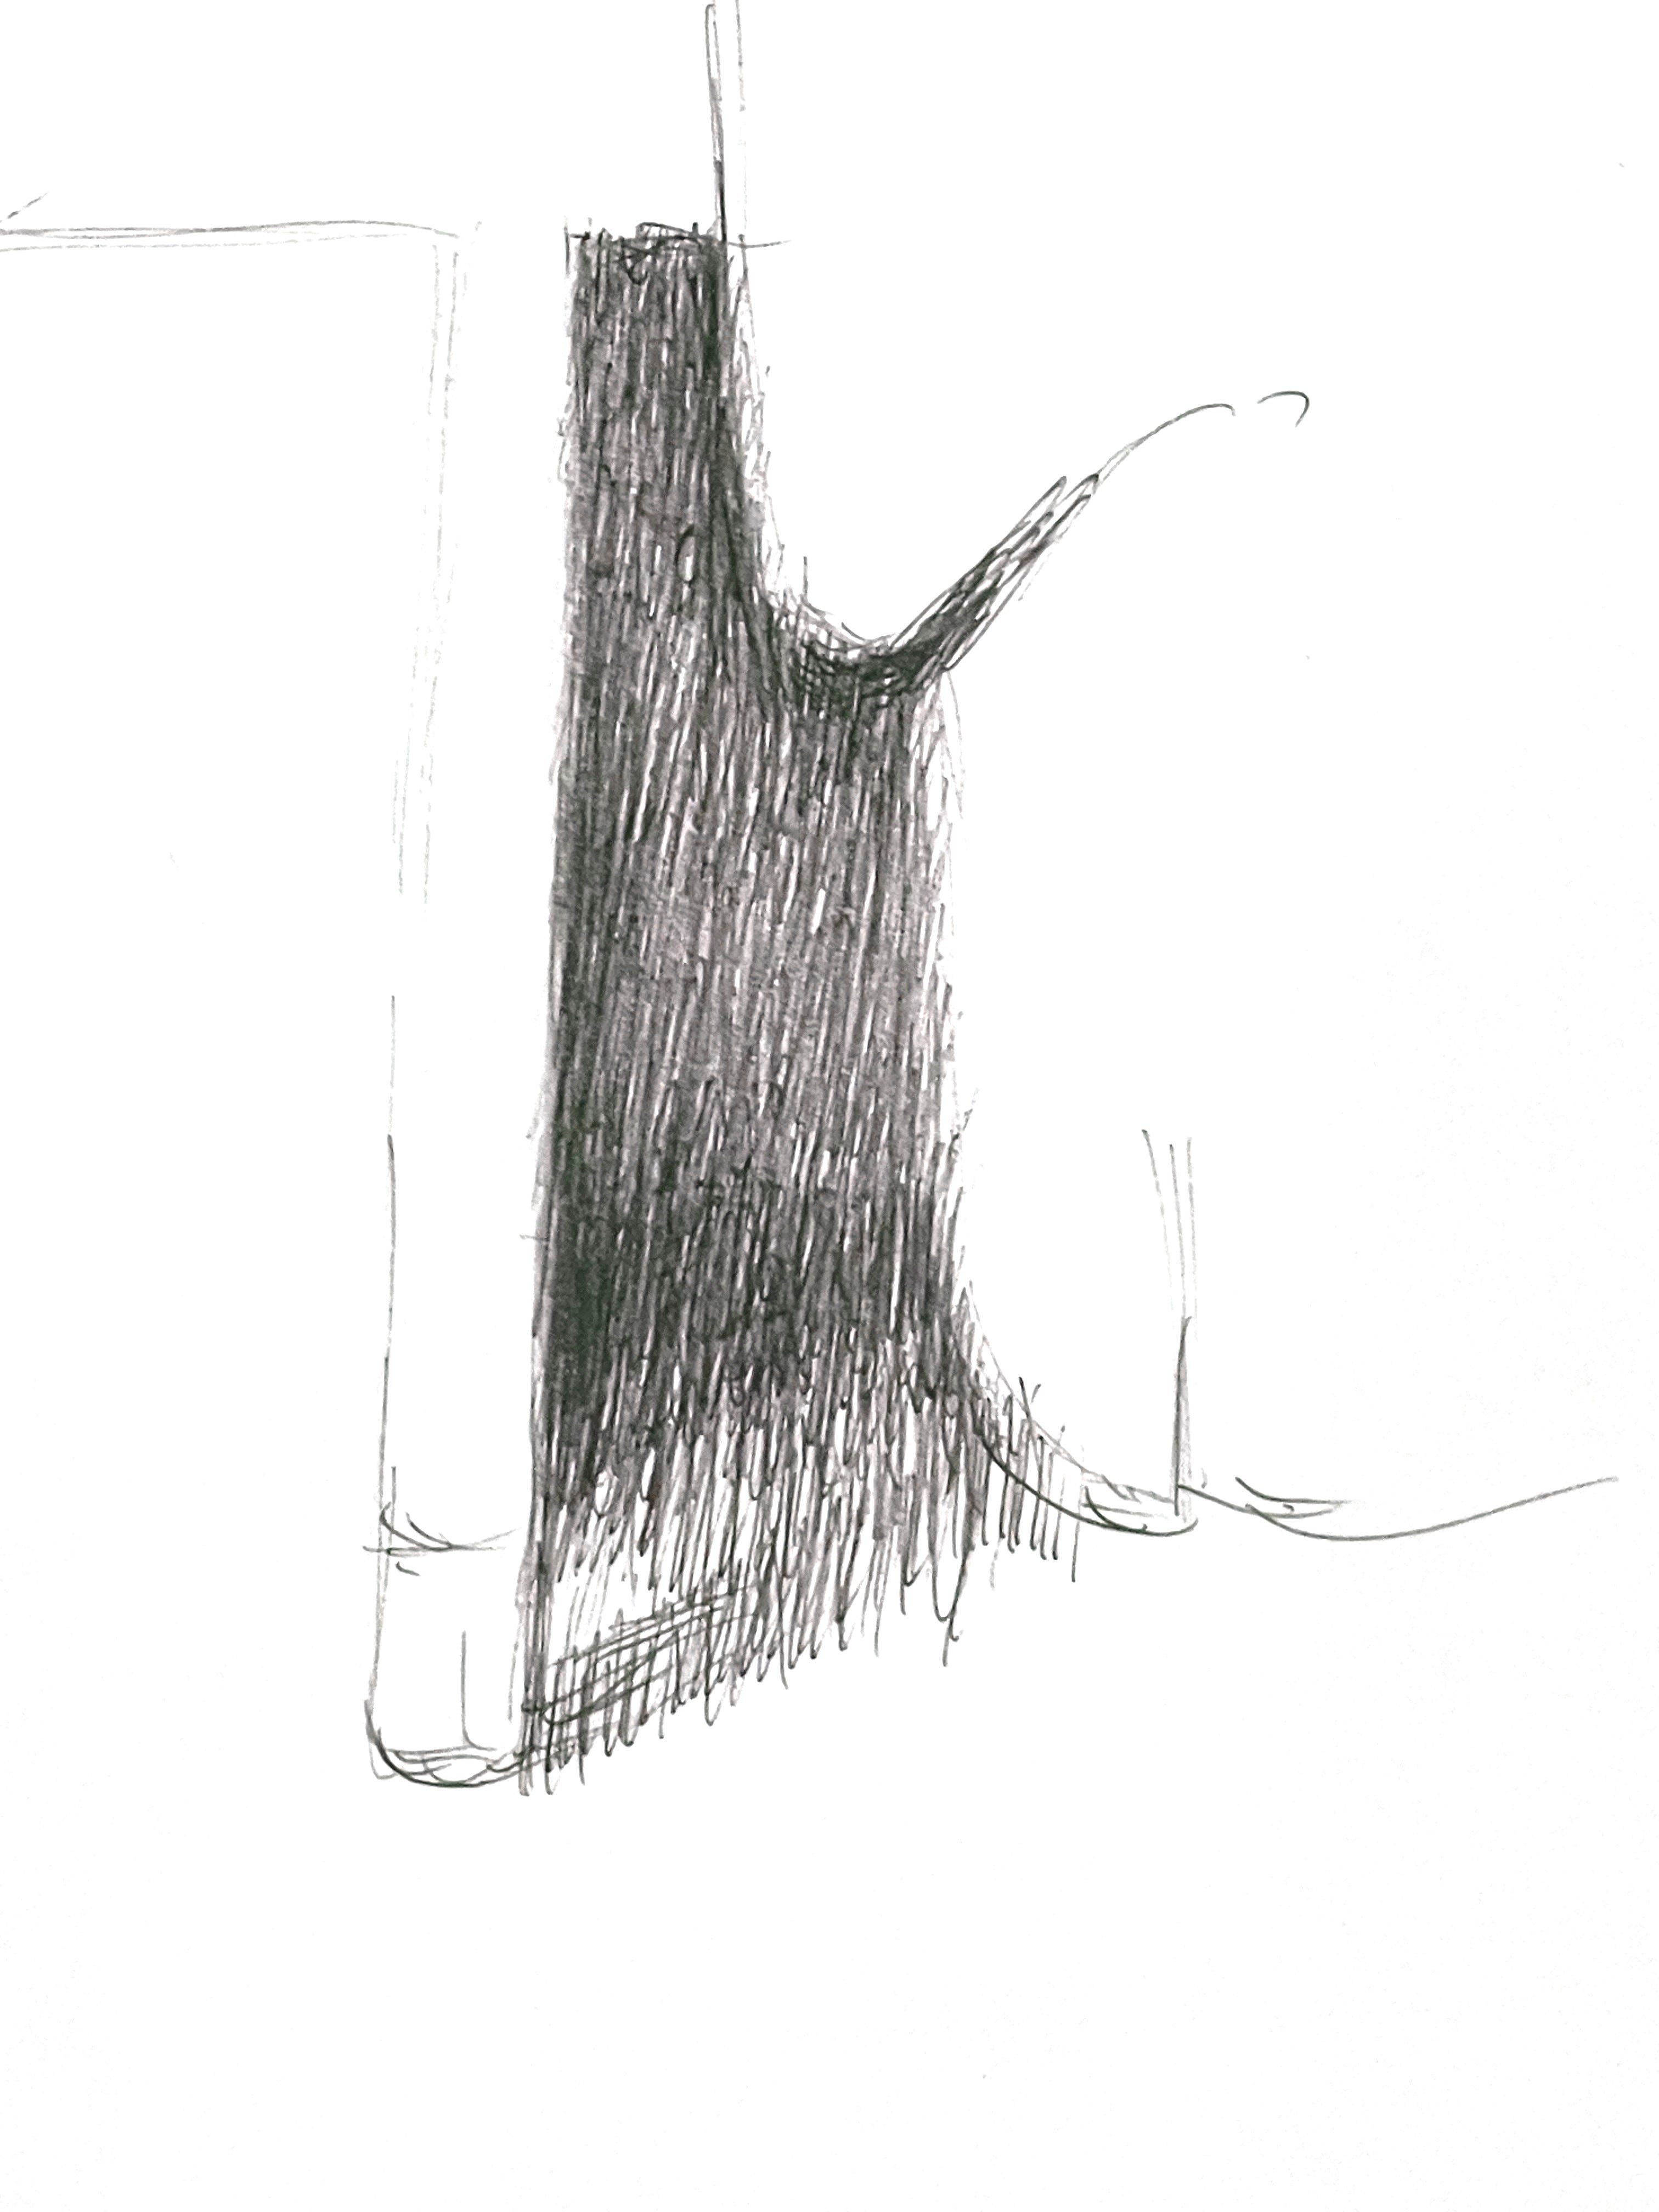
144 Newberry. Ink study of Rembrandt’s dark negative space.
In mastering the art of warping negative space, you unlock a powerful tool that adds depth, light, and life to your artwork. So, try it and discover the vast possibilities that lie in the space between the lines.
[1] A fascinating aspect of Vermeer's Girl with the Red Hat is the magical harmony between the hues and tones of the shadows on her face and the background. This creates a paradoxical effect where approximately four-fifths of her face appears transparent and see-through, while simultaneously revealing intricate details that depict a fully formed face.
[2] One of my favorite models, Lynia Zaaijer, a Dutch woman, served as the model for both the clay portrait and the sculptor in my painting, The Sculptor. I am being playful with the idea that Lynia is being both model and creator of herself.

Very interesting thoughts on seeing negative space, I like the exercises. Thank you for putting this helpful examination of negative space together.
Rembrandt is among the greatest of Western painters. Certainly one of the best Dutch Old Masters. Nice article.